One character can support an entire merchandise line—but that does not mean you should turn every possible product into a SKU.
When you develop anime merchandise, the real challenge starts after you choose the character. You need to decide which products deserve a place in the collection, which products should support the hero item, and which products should wait until you have enough sales data.
A strong character merchandise line does not simply contain more products. It gives each SKU a clear commercial role. It balances risk, manages inventory, and builds a logical path from a fan’s first impulse purchase to a high-value collector’s item.
In this guide, we will show you how to turn one anime character into a structured merchandise line that supports different price points, buying occasions, and re-order opportunities.
1. Start With the Character, Not the Product
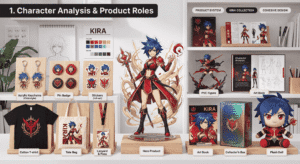
The biggest mistake in merchandising is starting with a list of popular products and forcing a character onto them. Before you select a single item to manufacture, you must analyze the character’s specific commercial potential.
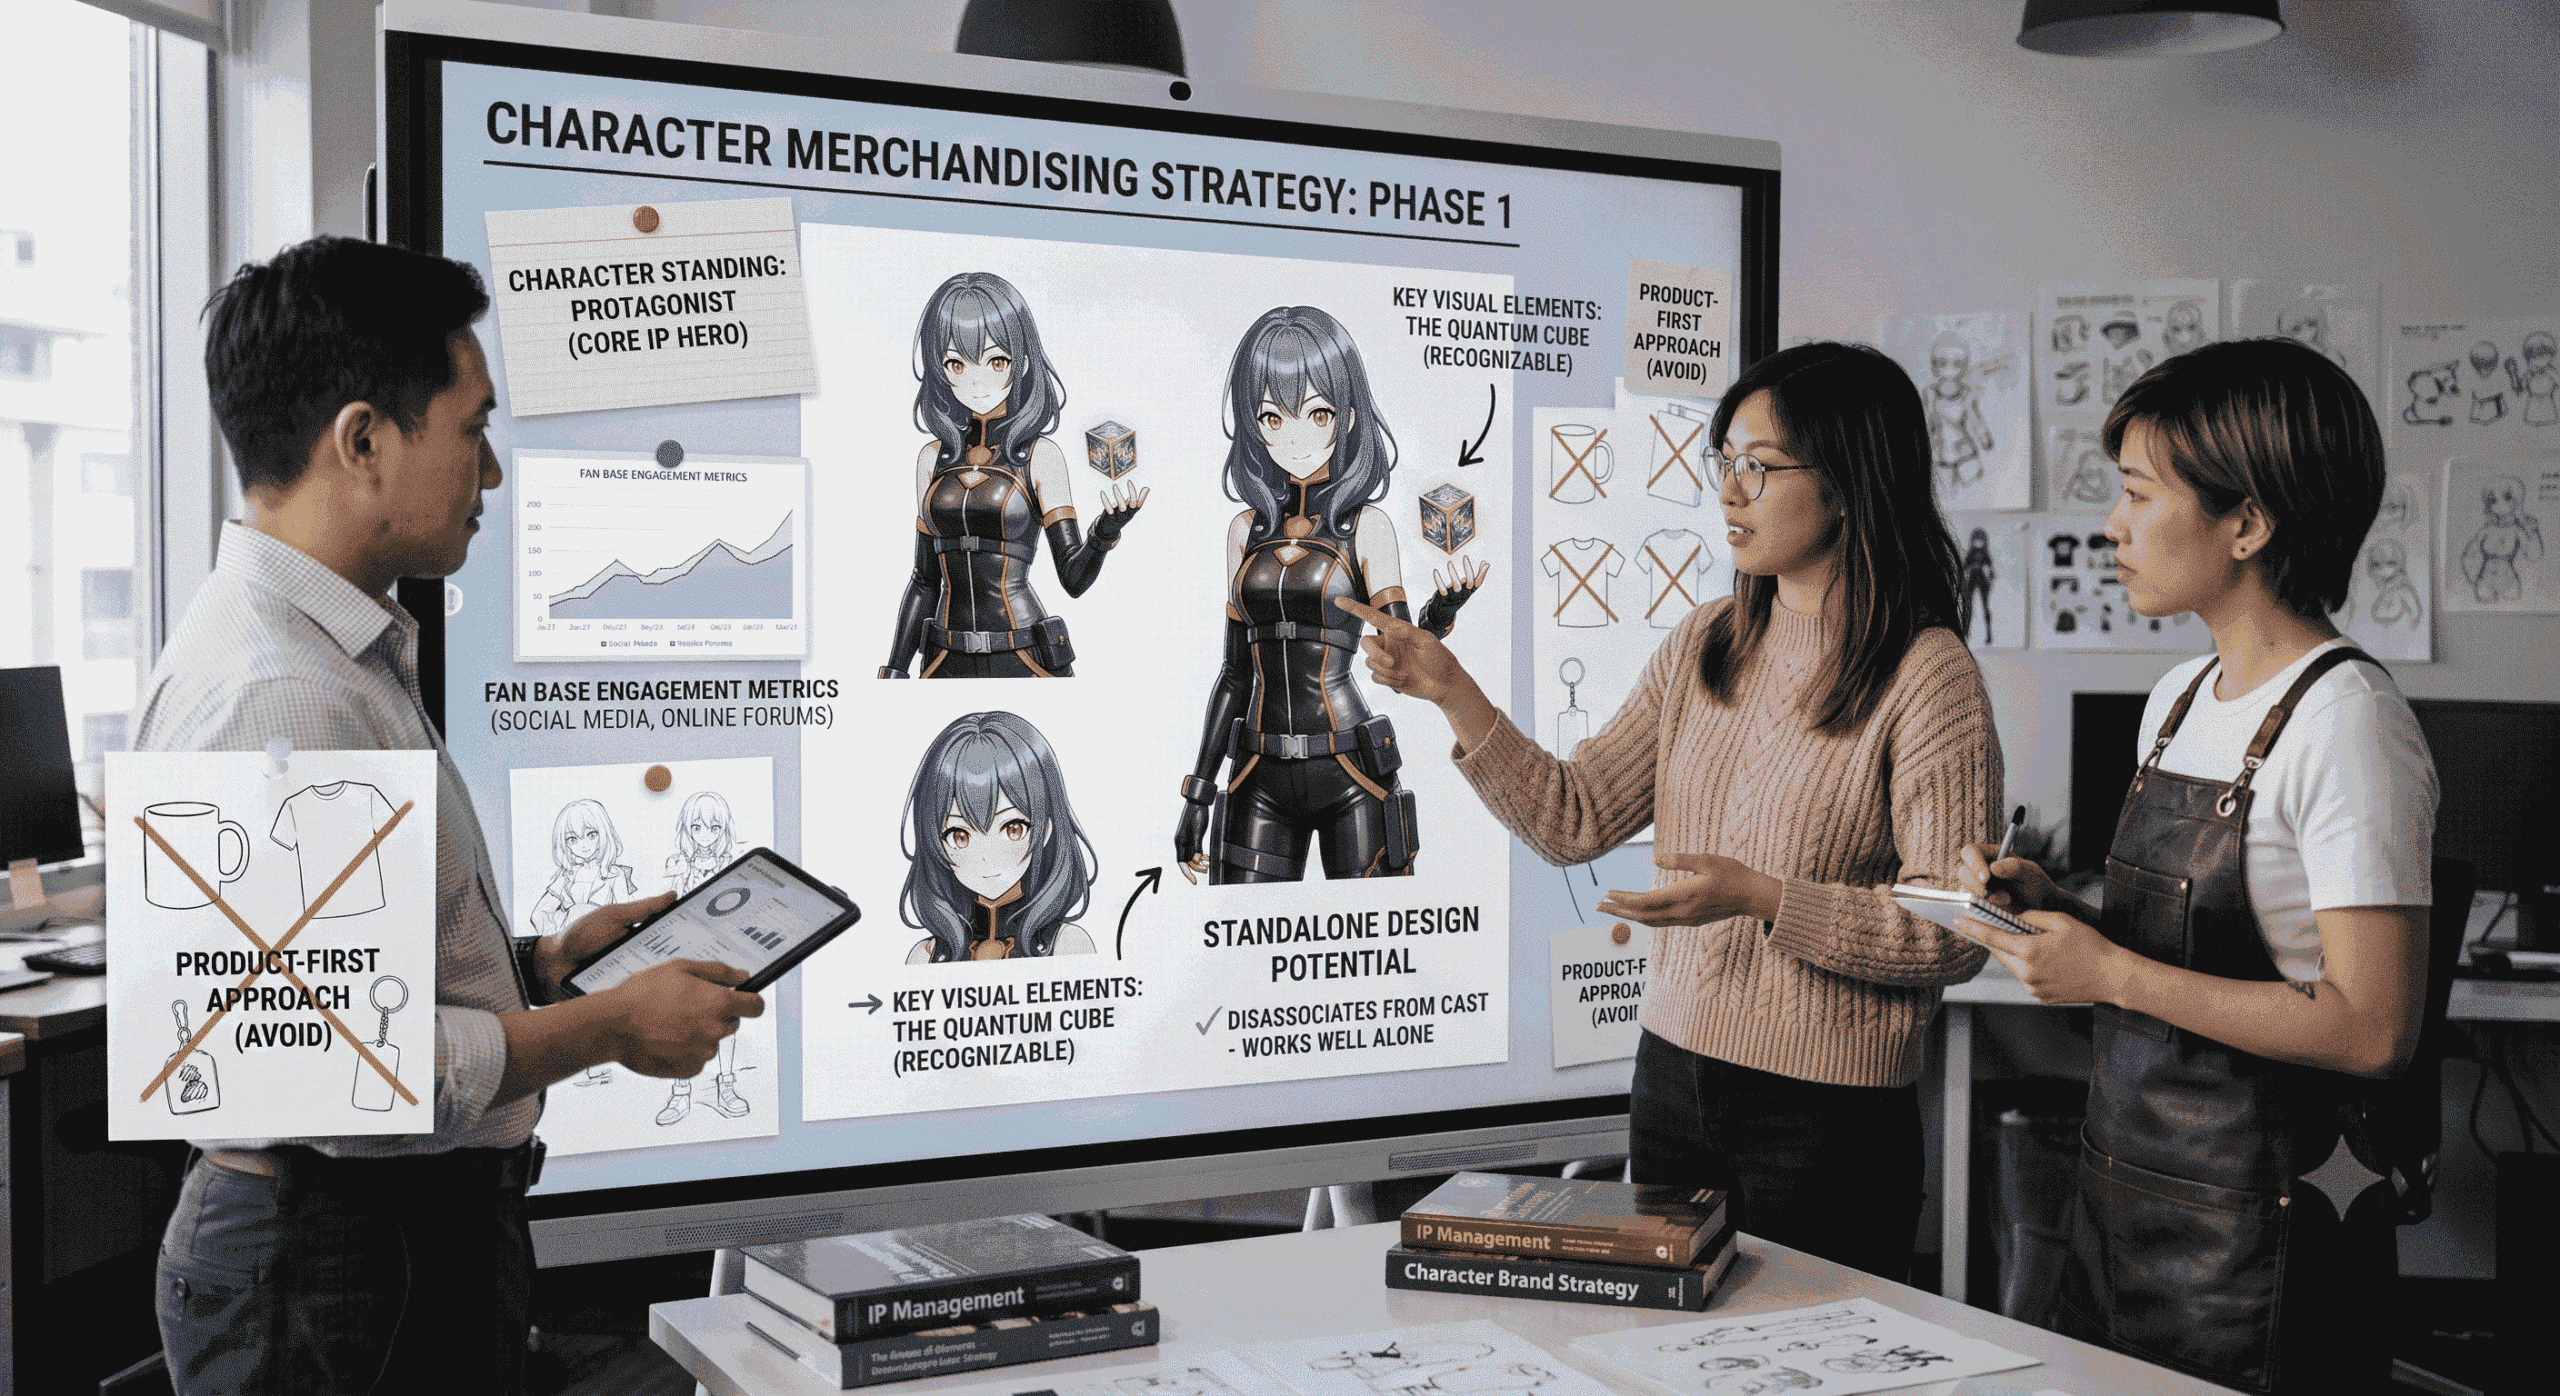
Character Popularity and Standing
Do not simply ask, “Is this character popular?” Instead, evaluate their position within the IP and their specific audience:
-
Is the character the main protagonist, a beloved side character, or a niche fan favorite?
-
Does the character have a strong, dedicated fan base willing to spend money?
-
Does the character have recognizable visual elements (a specific weapon, color palette, or catchphrase)?
-
Does the character work well as a standalone design without needing the rest of the cast?
Artwork Potential
Merchandise potential depends not only on character popularity but also on the quality and variety of available artwork. If you only have one standard, forward-facing character illustration, your SKU expansion will be severely limited.
However, your ability to build a comprehensive line expands dramatically if you have access to:
-
Full-body artwork
-
Multiple dynamic poses
-
Different facial expressions
-
Alternate costumes or seasonal outfits
-
Chibi (super-deformed) style illustrations
-
Group artwork that can be separated into individual assets
A single piece of art creates a product. A diverse artwork system creates a merchandise line.
2. Build a Product Ladder
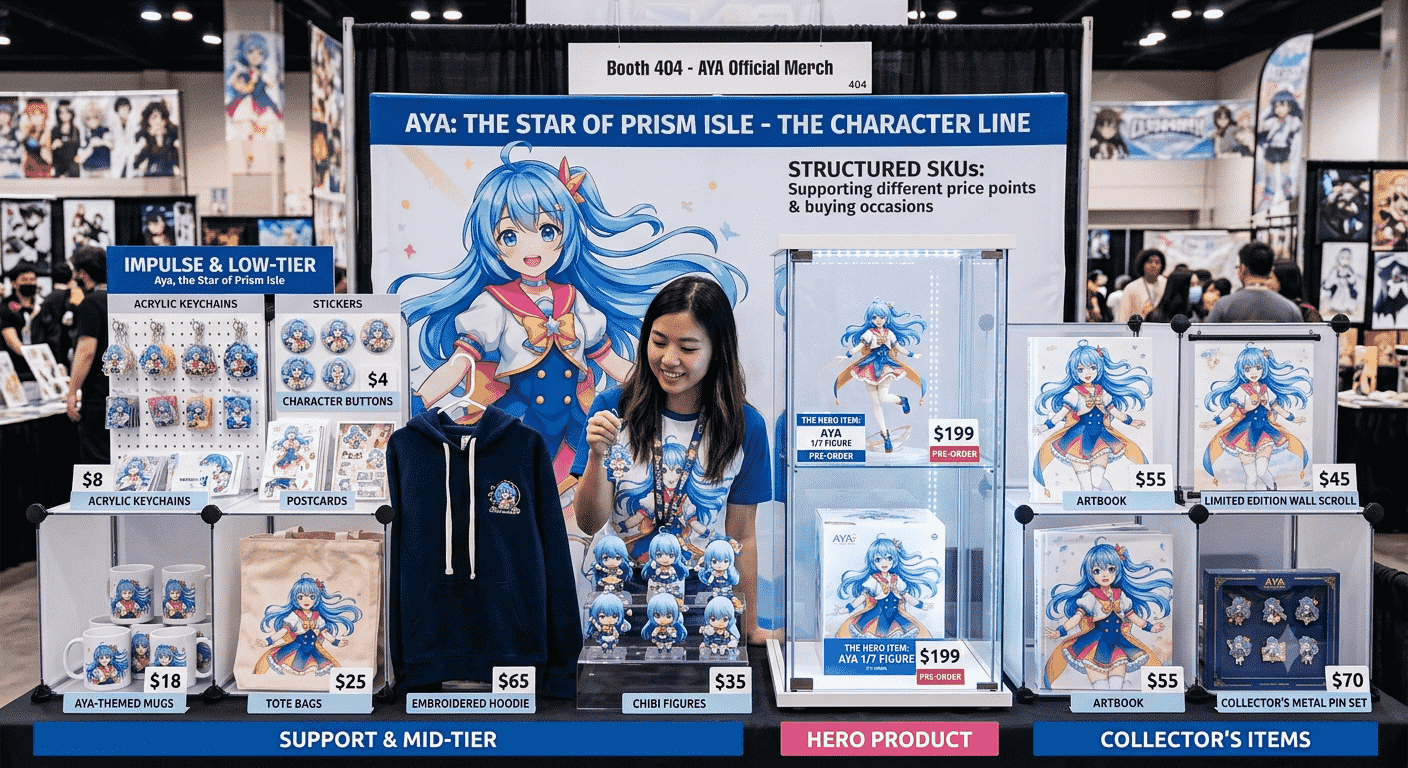
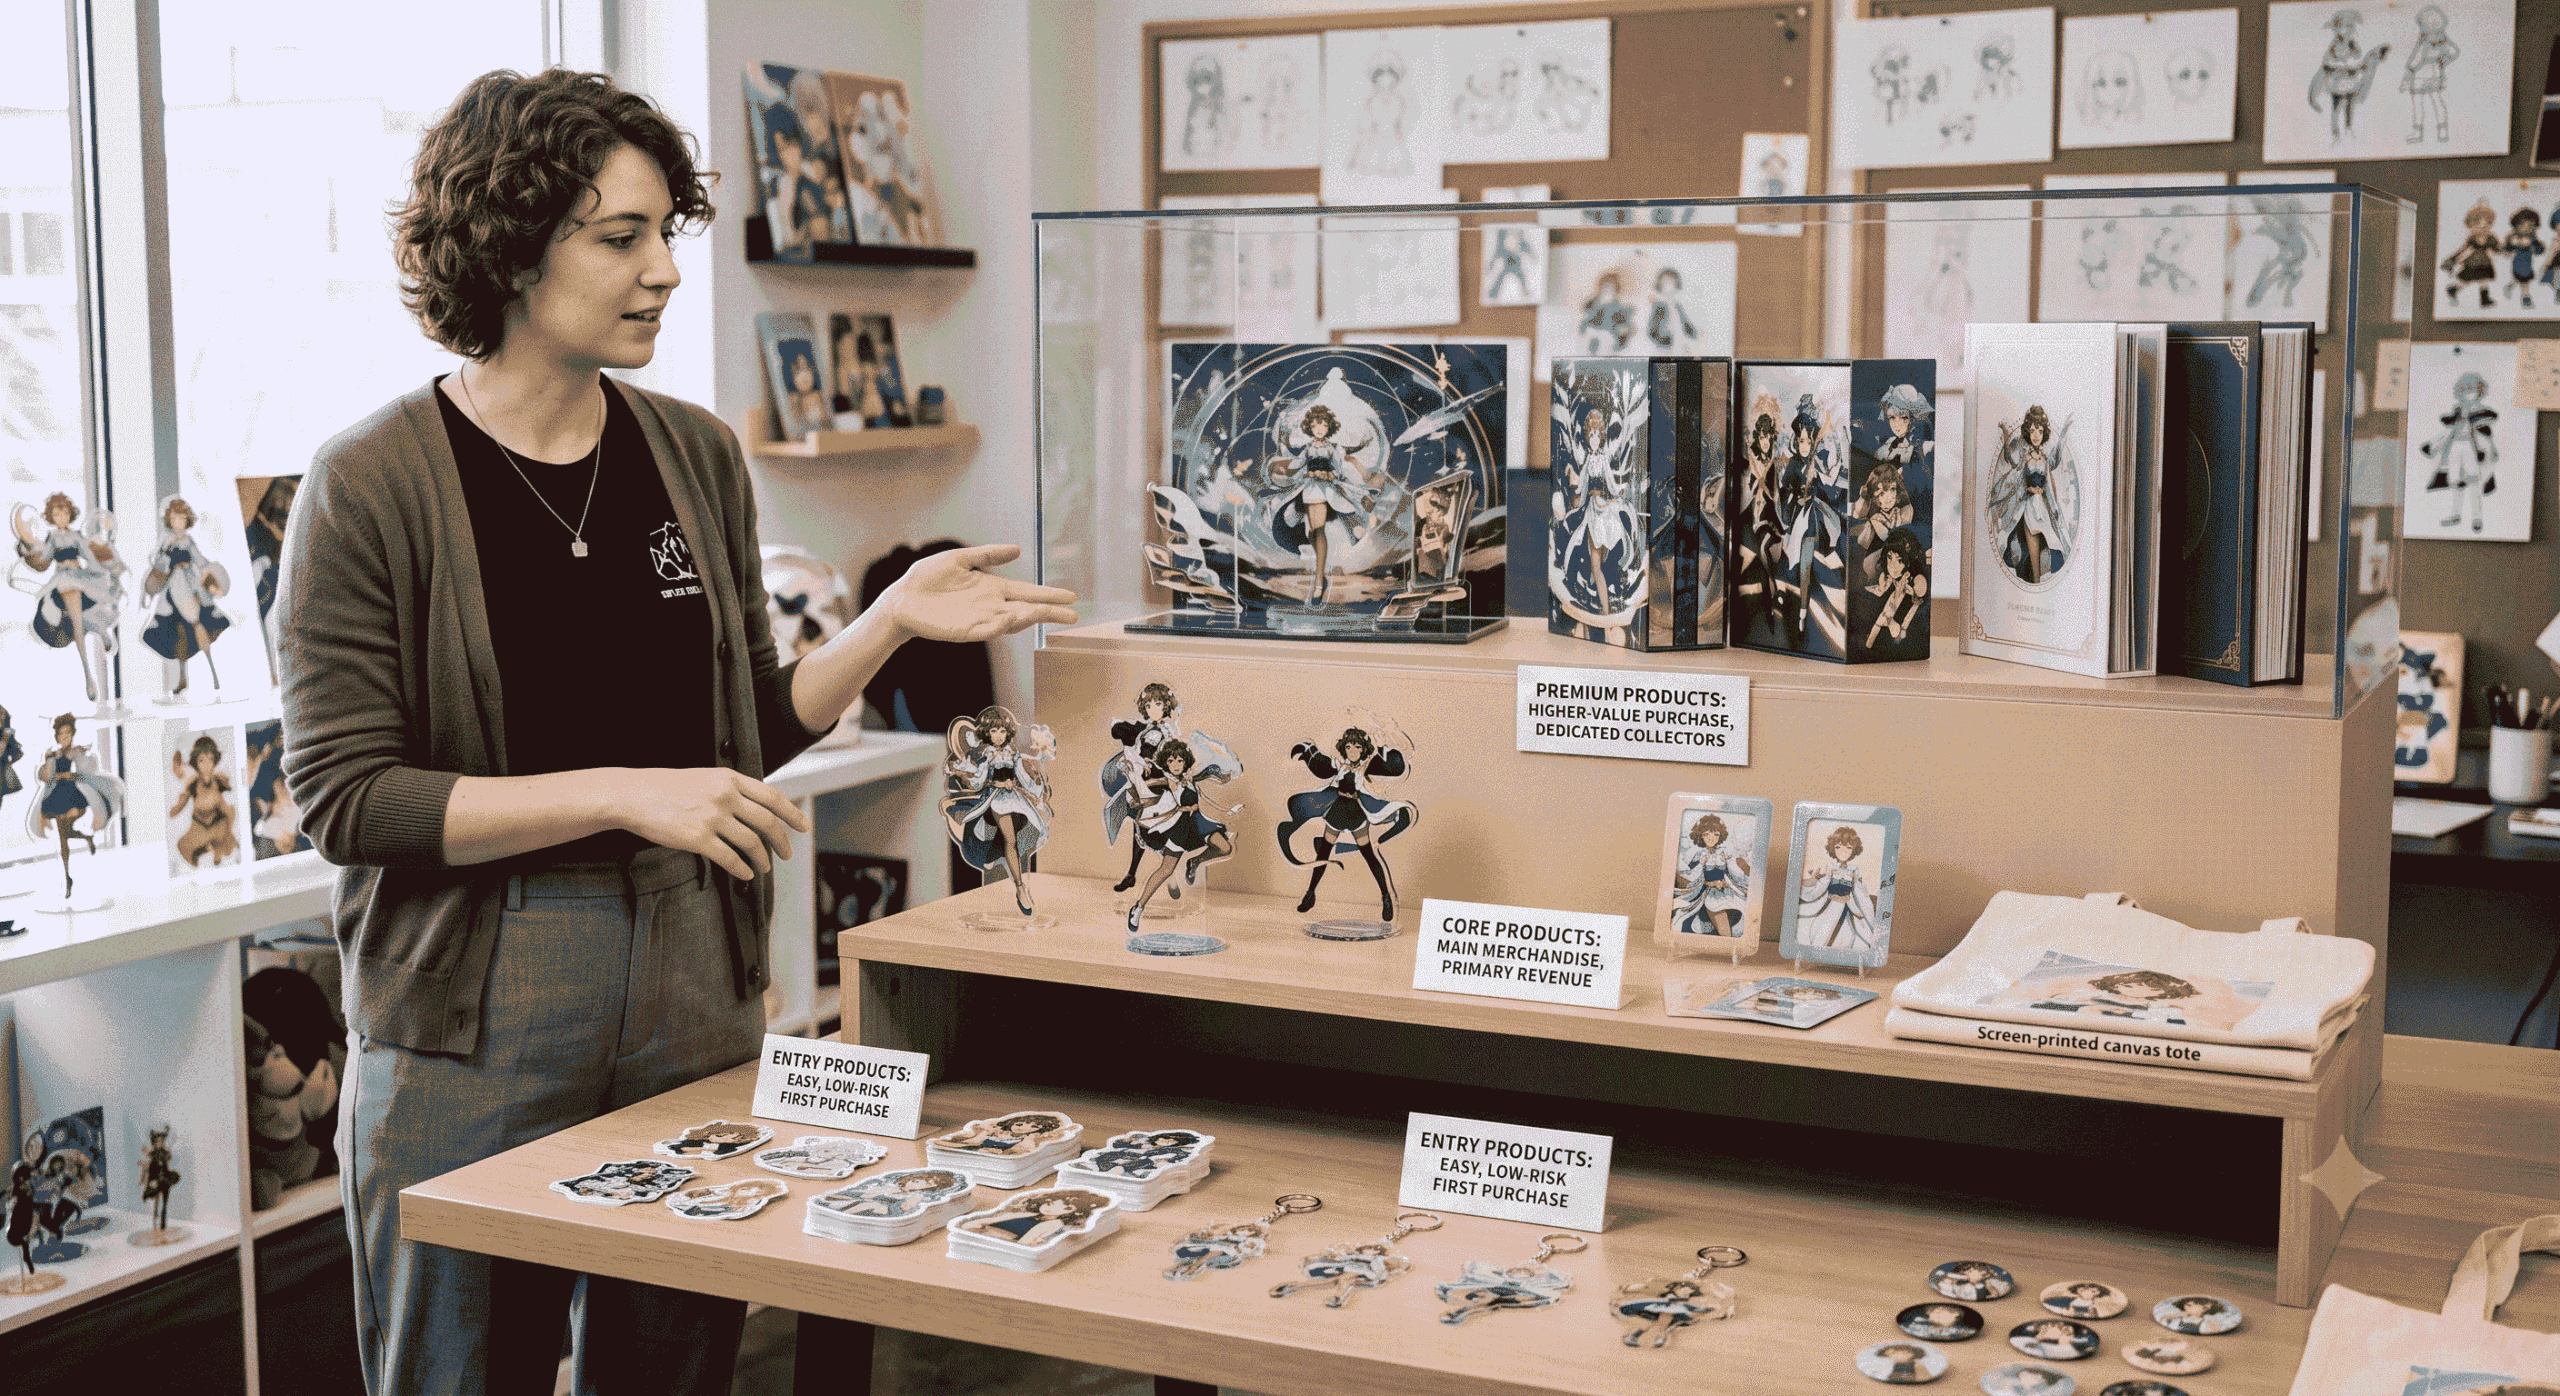
Once you understand the character’s visual assets, do not immediately list out 20 products you want to make. Instead, organize potential items into a “Product Ladder.” This strategy categorizes items by their commercial purpose, guiding consumers from cheap impulse buys to premium investments.
Entry Products
These are low-barrier, highly affordable items.
-
Examples: Stickers, Acrylic Keychains, Pin Badges.
-
Purpose: To lower the barrier to entry. They capture casual fans or fans with limited budgets, ensuring no one leaves empty-handed.
Core Products
These form the backbone of the character’s collection.
-
Examples: Standard Acrylic Standees, Photocard Holders, Tote Bags.
-
Purpose: To establish the main commercial value of the character. These are the items most fans actively seek out to display their fandom.
Premium Products
These are high-margin items designed for dedicated collectors.
-
Examples: Large-scale Acrylic Standees, Multi-character Diorama Sets, Limited Edition Box Sets.
-
Purpose: To increase the average order value (AOV) and satisfy hardcore fans who want centerpiece items for their collections.
| Product Level | Example Products | Main Purpose |
| Entry | Sticker, Keychain, Pin Badge | Easy, low-risk first purchase. |
| Core | Acrylic Standee, Tote Bag | Main merchandise and primary revenue driver. |
| Premium | Large Standee, Character Set | Higher-value purchase for dedicated collectors. |
 3. Assign Different Products to Different Buying Situations
 3. Assign Different Products to Different Buying Situations
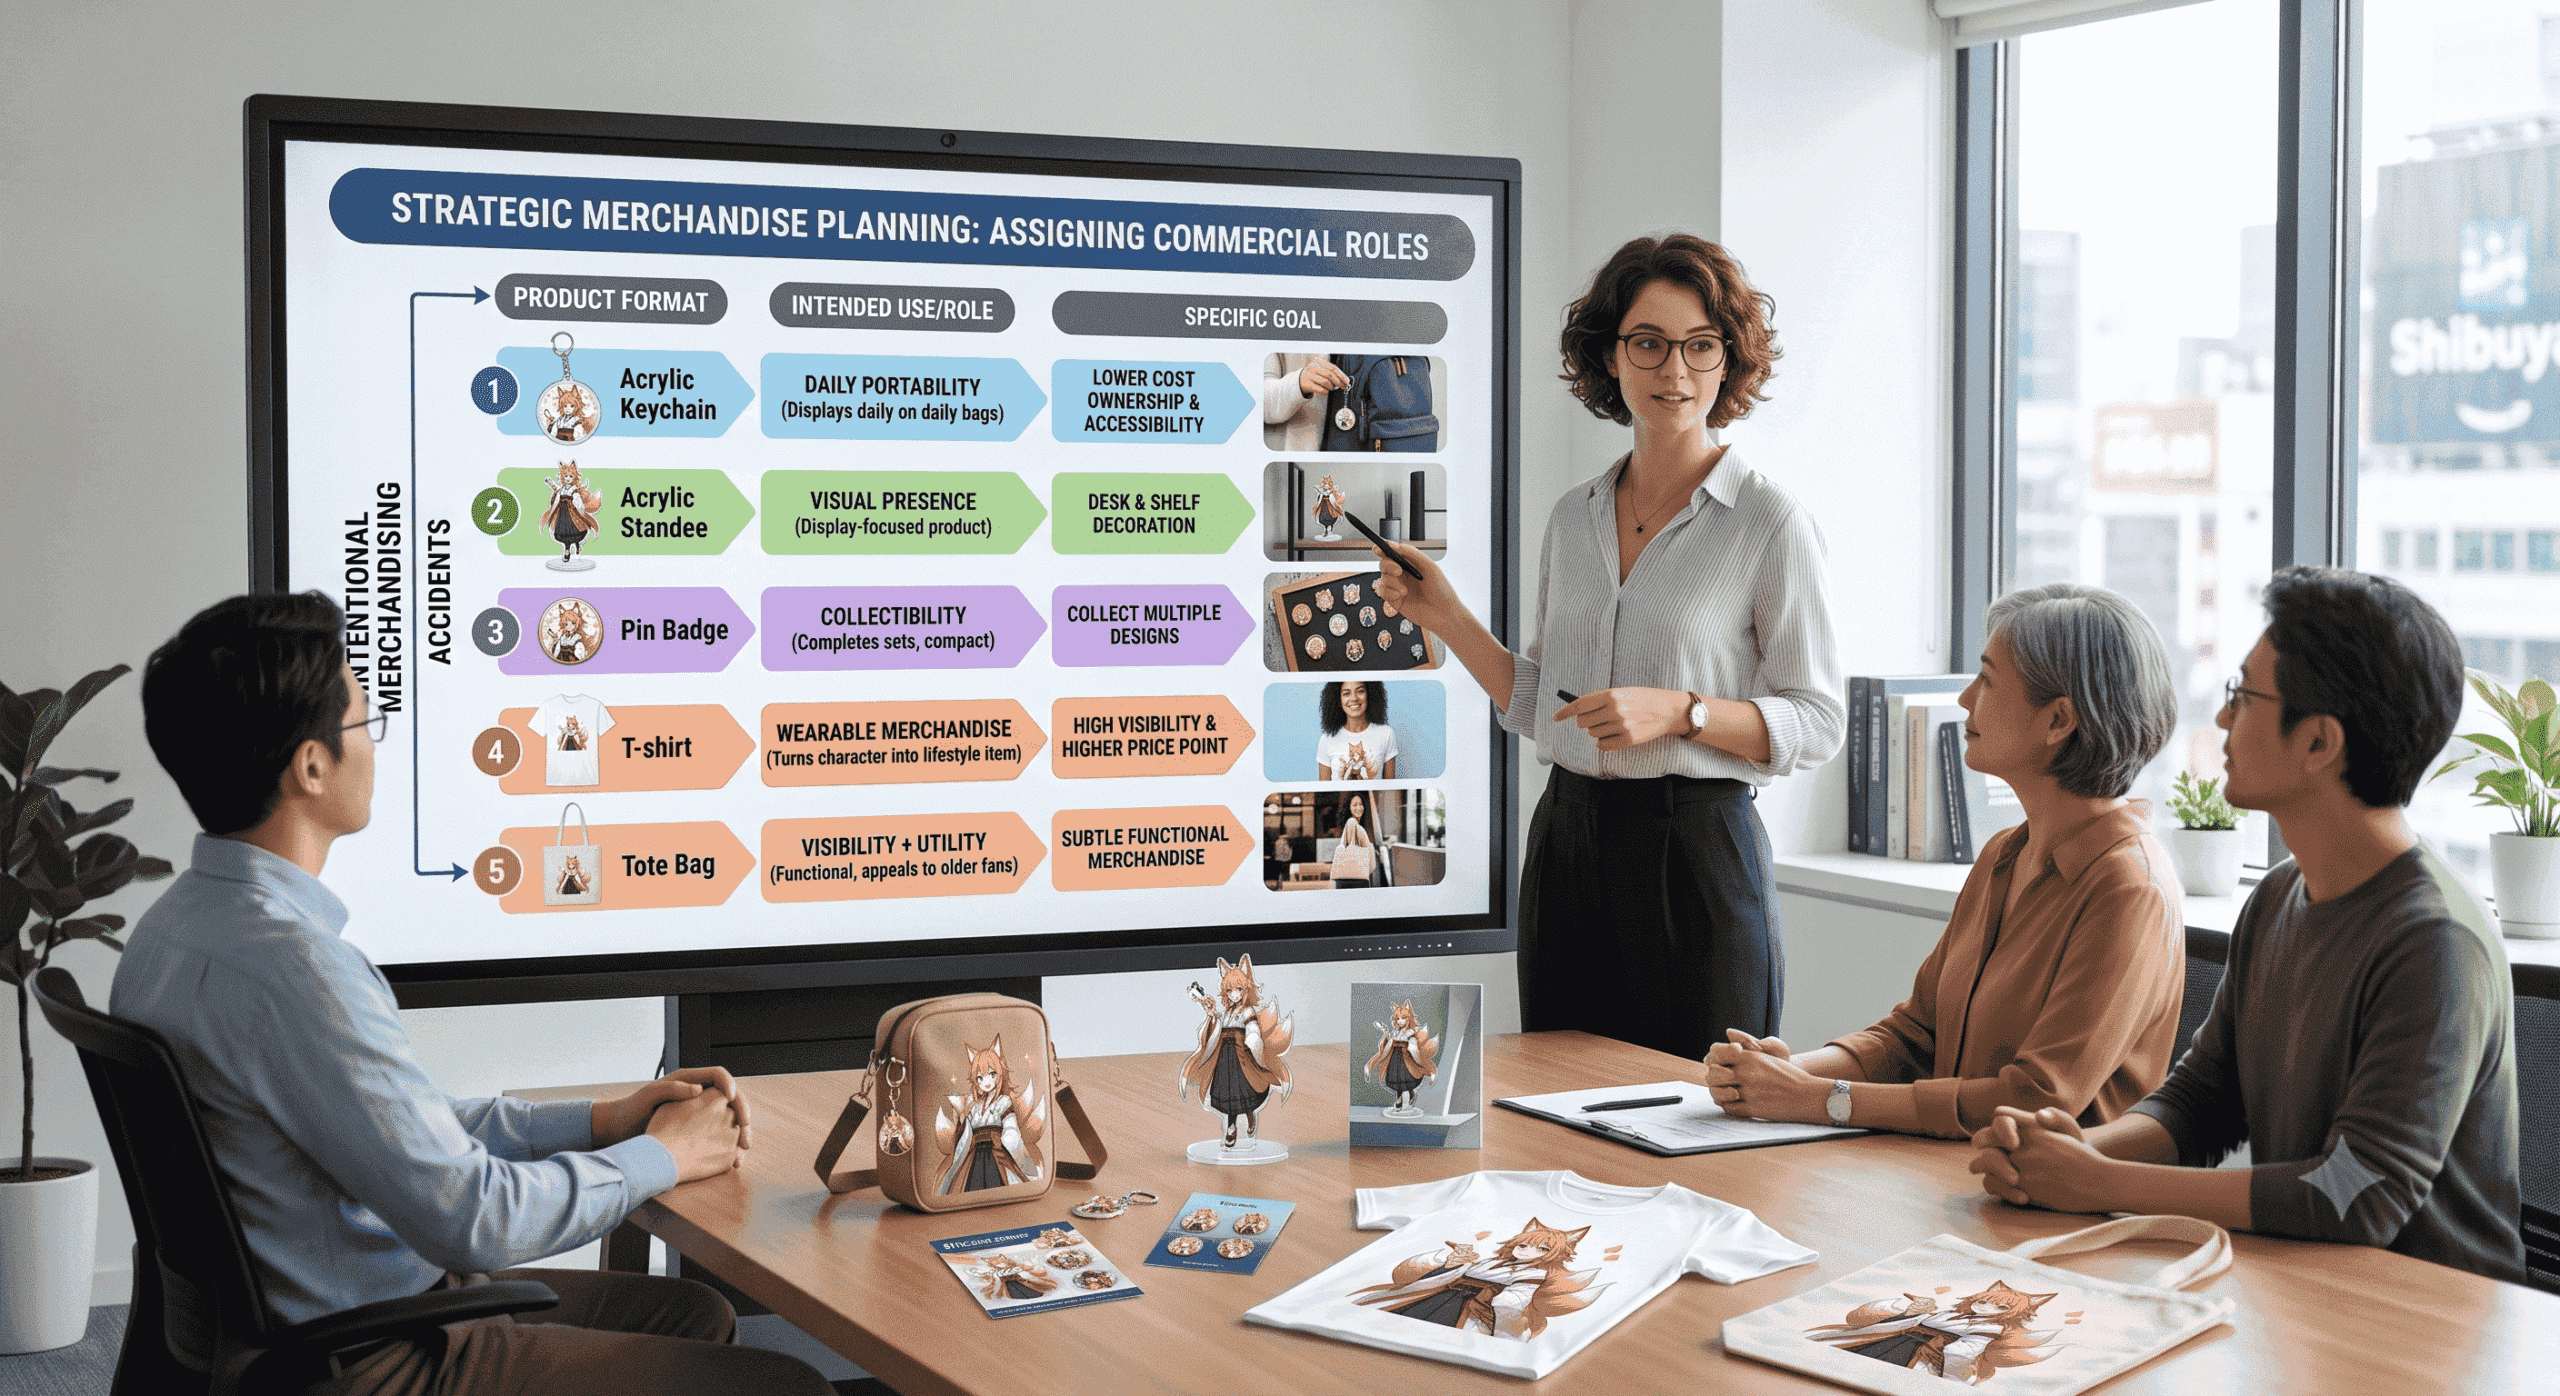
Every SKU in your lineup must have a reason to exist beyond “it’s a popular format.” Give every product a clear commercial role based on how the consumer will interact with it.
-
Acrylic Keychain: It is not just a popular item; it gives fans a lower-cost, portable way to own the character and display it on their daily bags.
-
Acrylic Standee: It gives the character a strong visual presence and works perfectly as a display-focused product for desks or shelves.
-
Pin Badge: It works beautifully as a collectible. Because of its size and price, it allows buyers to collect multiple designs or complete a set without taking up physical space.
-
T-shirt: It turns the character into wearable merchandise, expanding the product from a “display piece” to a lifestyle item, which supports a higher price point.
-
Tote Bag: It combines character visibility with everyday utility, appealing to older fans or those who prefer subtle, functional merchandise.
When you define why a product exists, your merchandising strategy becomes intentional rather than accidental.
4. Do Not Turn Every Possible Product Into a SKU
More SKUs do not automatically create a stronger merchandise line. In fact, for a B2B buyer or a retailer, launching too many items at once is a massive risk.
Imagine launching a new character with 5 standees, 5 keychains, 5 pin badges, 3 T-shirts, and 3 bags all at once. For a single IP or character, this creates severe commercial strain:
-
Fragmented inventory
-
Immense Minimum Order Quantity (MOQ) pressure
-
High initial design and sampling costs
-
Excessive packaging expenses
-
Complex warehouse management
Especially for a new character, you must control the initial scope.
The First Launch Formula:
We recommend a structure of 1 Hero Product + 2 to 4 Supporting Products.
For example, a strong initial launch looks like:
-
1 Acrylic Standee (Hero)
-
1 Acrylic Keychain (Supporting)
-
1 Pin Badge (Supporting)
-
1 Die-cut Sticker (Supporting)
This focused approach aligns perfectly with smart retail and B2B purchasing logic: minimize initial risk while maximizing product variety.
5. Create a Core + Test + Premium Structure
To manage inventory and gauge consumer interest, organize your character’s SKUs into a strategic hierarchy:
-
Core SKUs (High Certainty): The flagship products you know will sell. (e.g., The standard Acrylic Standee).
-
Test SKUs (Low Risk): Small, cheap items used to test consumer reaction to a new pose or artwork style. (e.g., Keychains, Stickers).
-
Premium SKUs (High Reward): High-ticket items produced in limited quantities for hardcore collectors. (e.g., Oversized acrylic dioramas).
Visually, your merchandise ecosystem should look like this:
Plaintext
                     CHARACTER
                         │
        ┌────────────────┼────────────────┐
        │                │                │
      TEST              CORE           PREMIUM
        │                │                │
     Keychain         Standee         Large Set
     Sticker          Tote Bag        Limited Box
     Pin Badge
This structure ensures that you are never relying entirely on untested, expensive products, nor are you leaving money on the table by only offering cheap items.
6. Build the Collection Around the Character Artwork
If you use custom manufacturing, you have total control over the product’s final look. However, one of the biggest mistakes brands make is simply copy-pasting the exact same artwork onto every single product.
Do not simply copy the same artwork onto every product format. Adapt the artwork to the product’s function.
Different products have different viewing distances, physical sizes, printing areas, and usage contexts. A highly detailed full-body illustration that looks incredible on an acrylic standee will look cluttered and illegible if shrunk down to a 3cm pin badge.
Instead, build multiple SKUs from an artwork system:
-
Artwork A (Full Body Illustration): Best for Acrylic Standees and Posters.
-
Artwork B (Chibi/Deformed Style): Perfect for Acrylic Keychains and small stickers.
-
Artwork C (Close-up Face/Expression): Ideal for Pin Badges or Photocard Holders.
-
Artwork D (Graphic/Typography Composition): Best suited for wearable items like T-shirts and Tote Bags.
This makes the collection feel diverse and encourages fans to buy multiple items, as they are getting different visual experiences from each product.
7. Consider Packaging and Retail Presentation
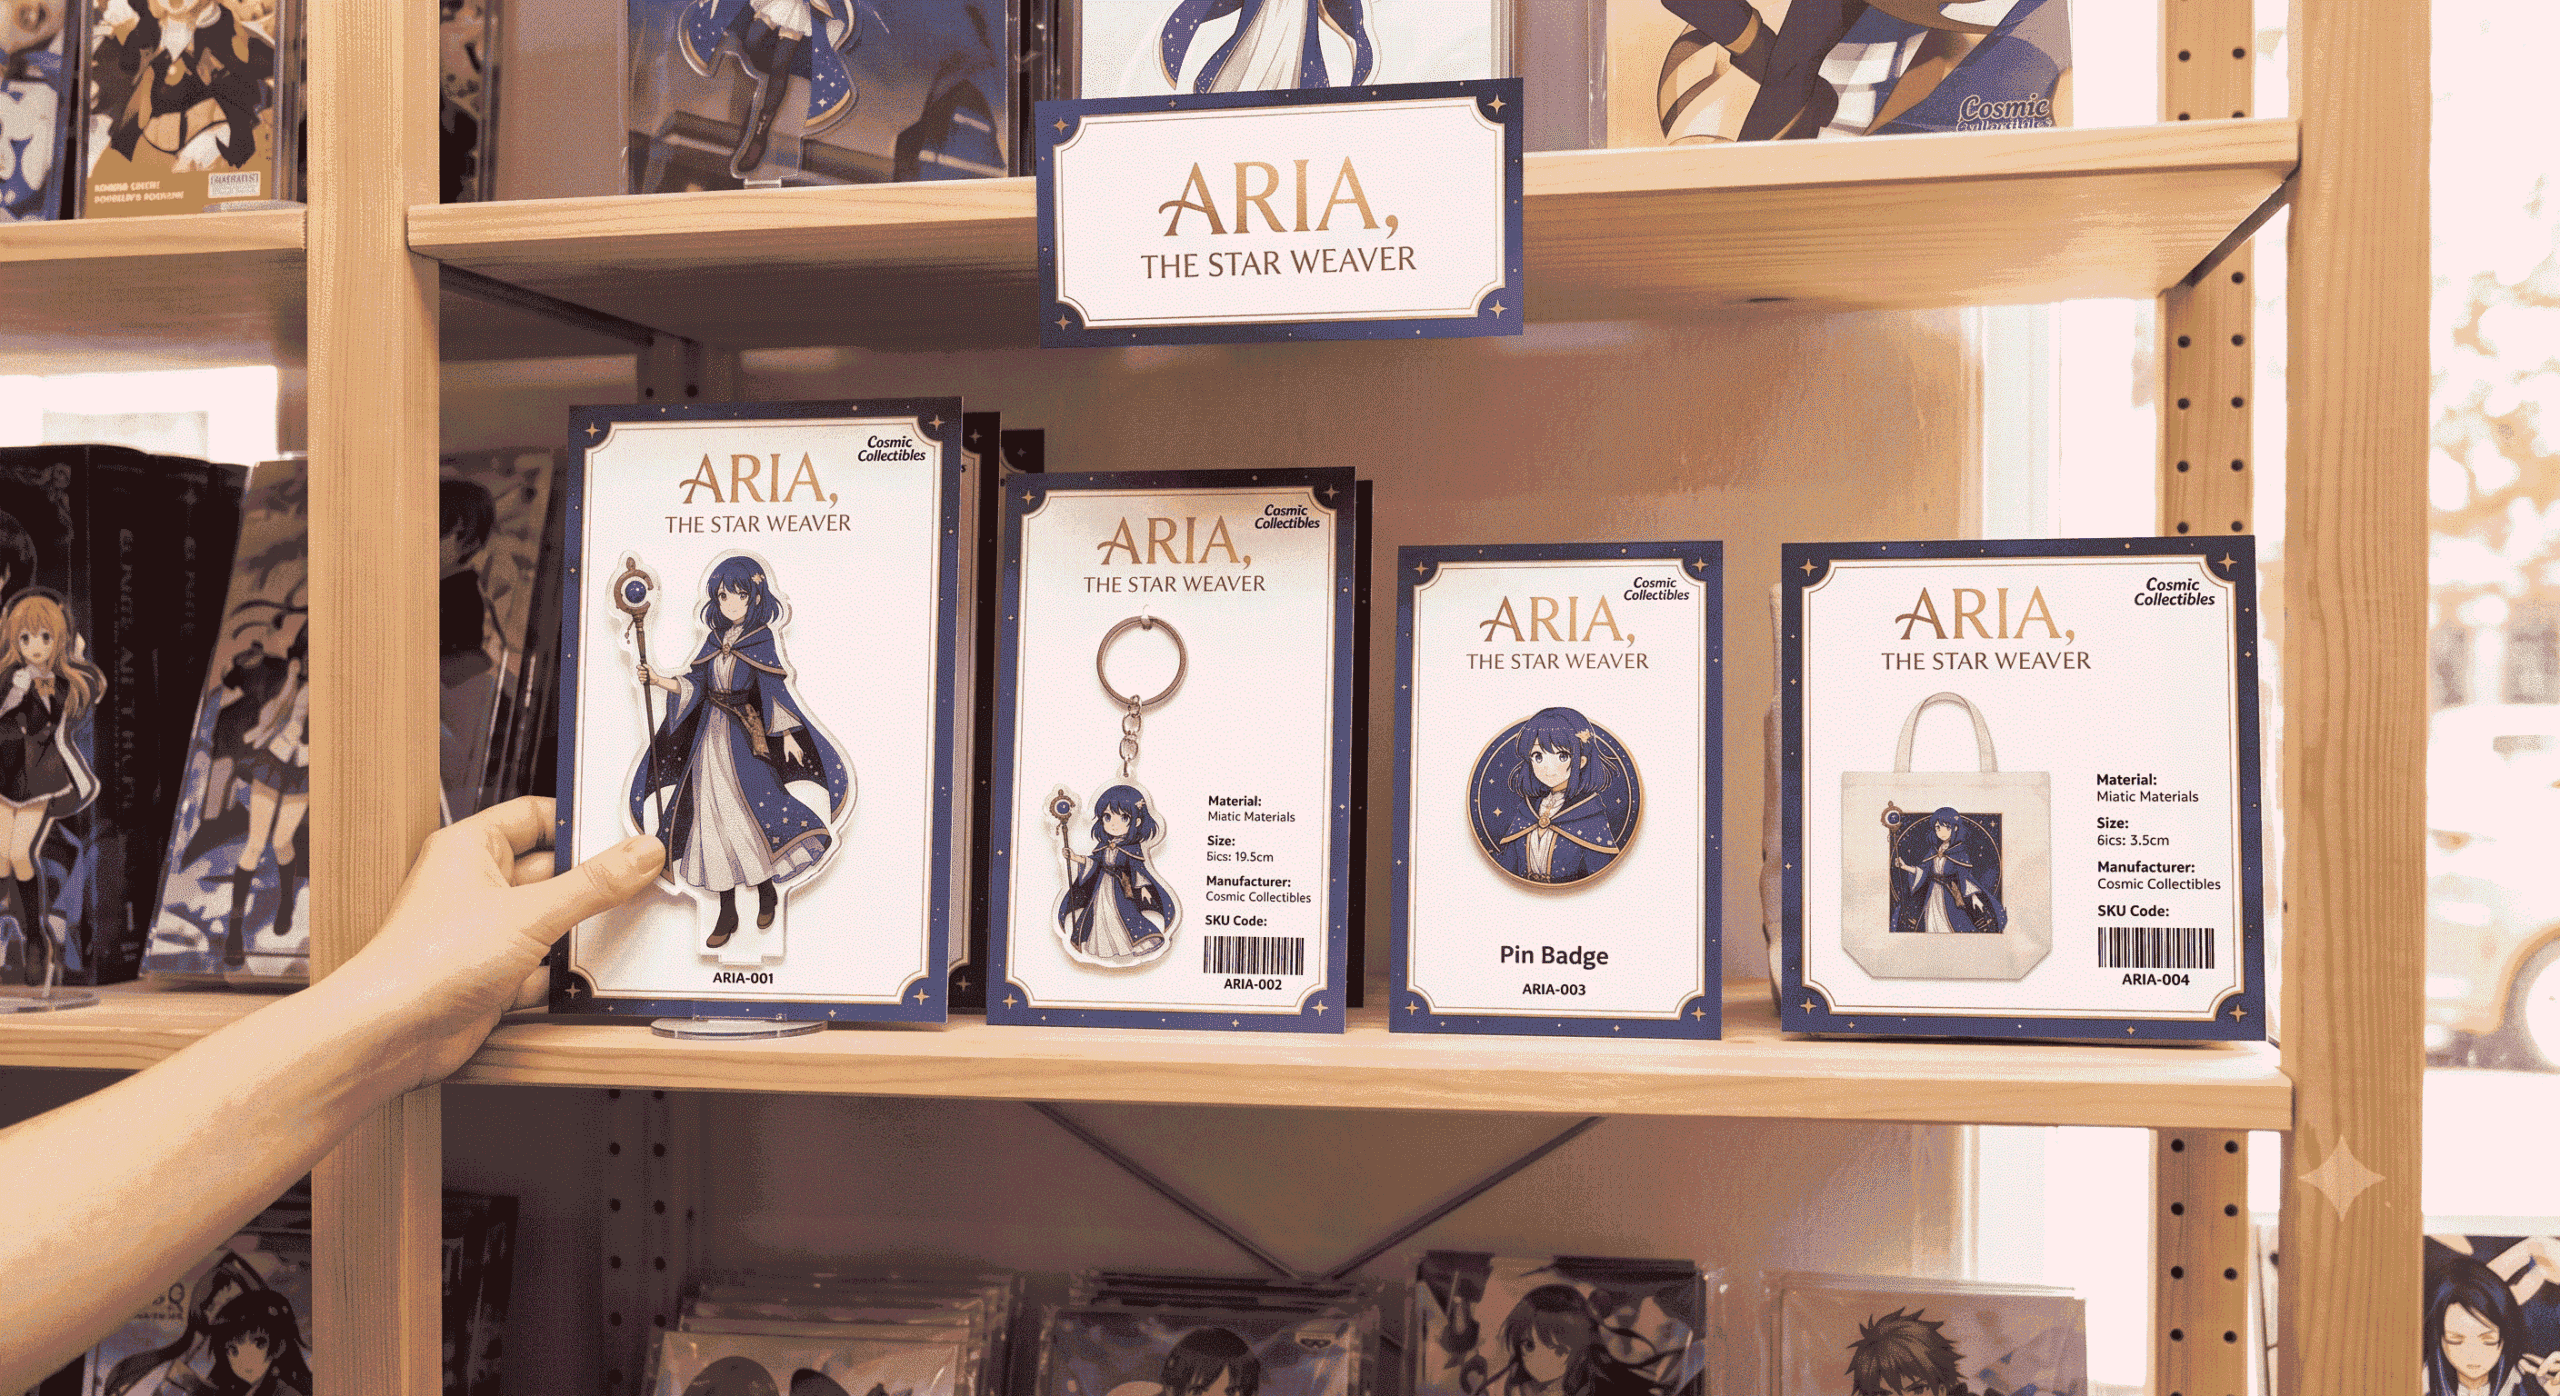
When turning a character into a line, the packaging is just as important as the product. A character collection must look like a cohesive family of items when placed on a retail shelf or an online storefront.
You do not need overly expensive or complicated packaging technology, but you do need strict visual consistency. A unified packaging system includes:
-
The exact same character name typography
-
A consistent brand color system
-
The same backing card layout and style
-
Consistent logo placement across all items
-
Unified product information formatting
-
Distinct, organized SKU codes
When a consumer sees an Acrylic Standee, a Keychain, a Pin Badge, and a Tote Bag side-by-side, they should immediately recognize them as parts of the same collection. This unified retail presentation is critical for boosting multi-item purchases and is highly valued by store owners and distributors.
8. Plan MOQ and Inventory Around SKU Risk
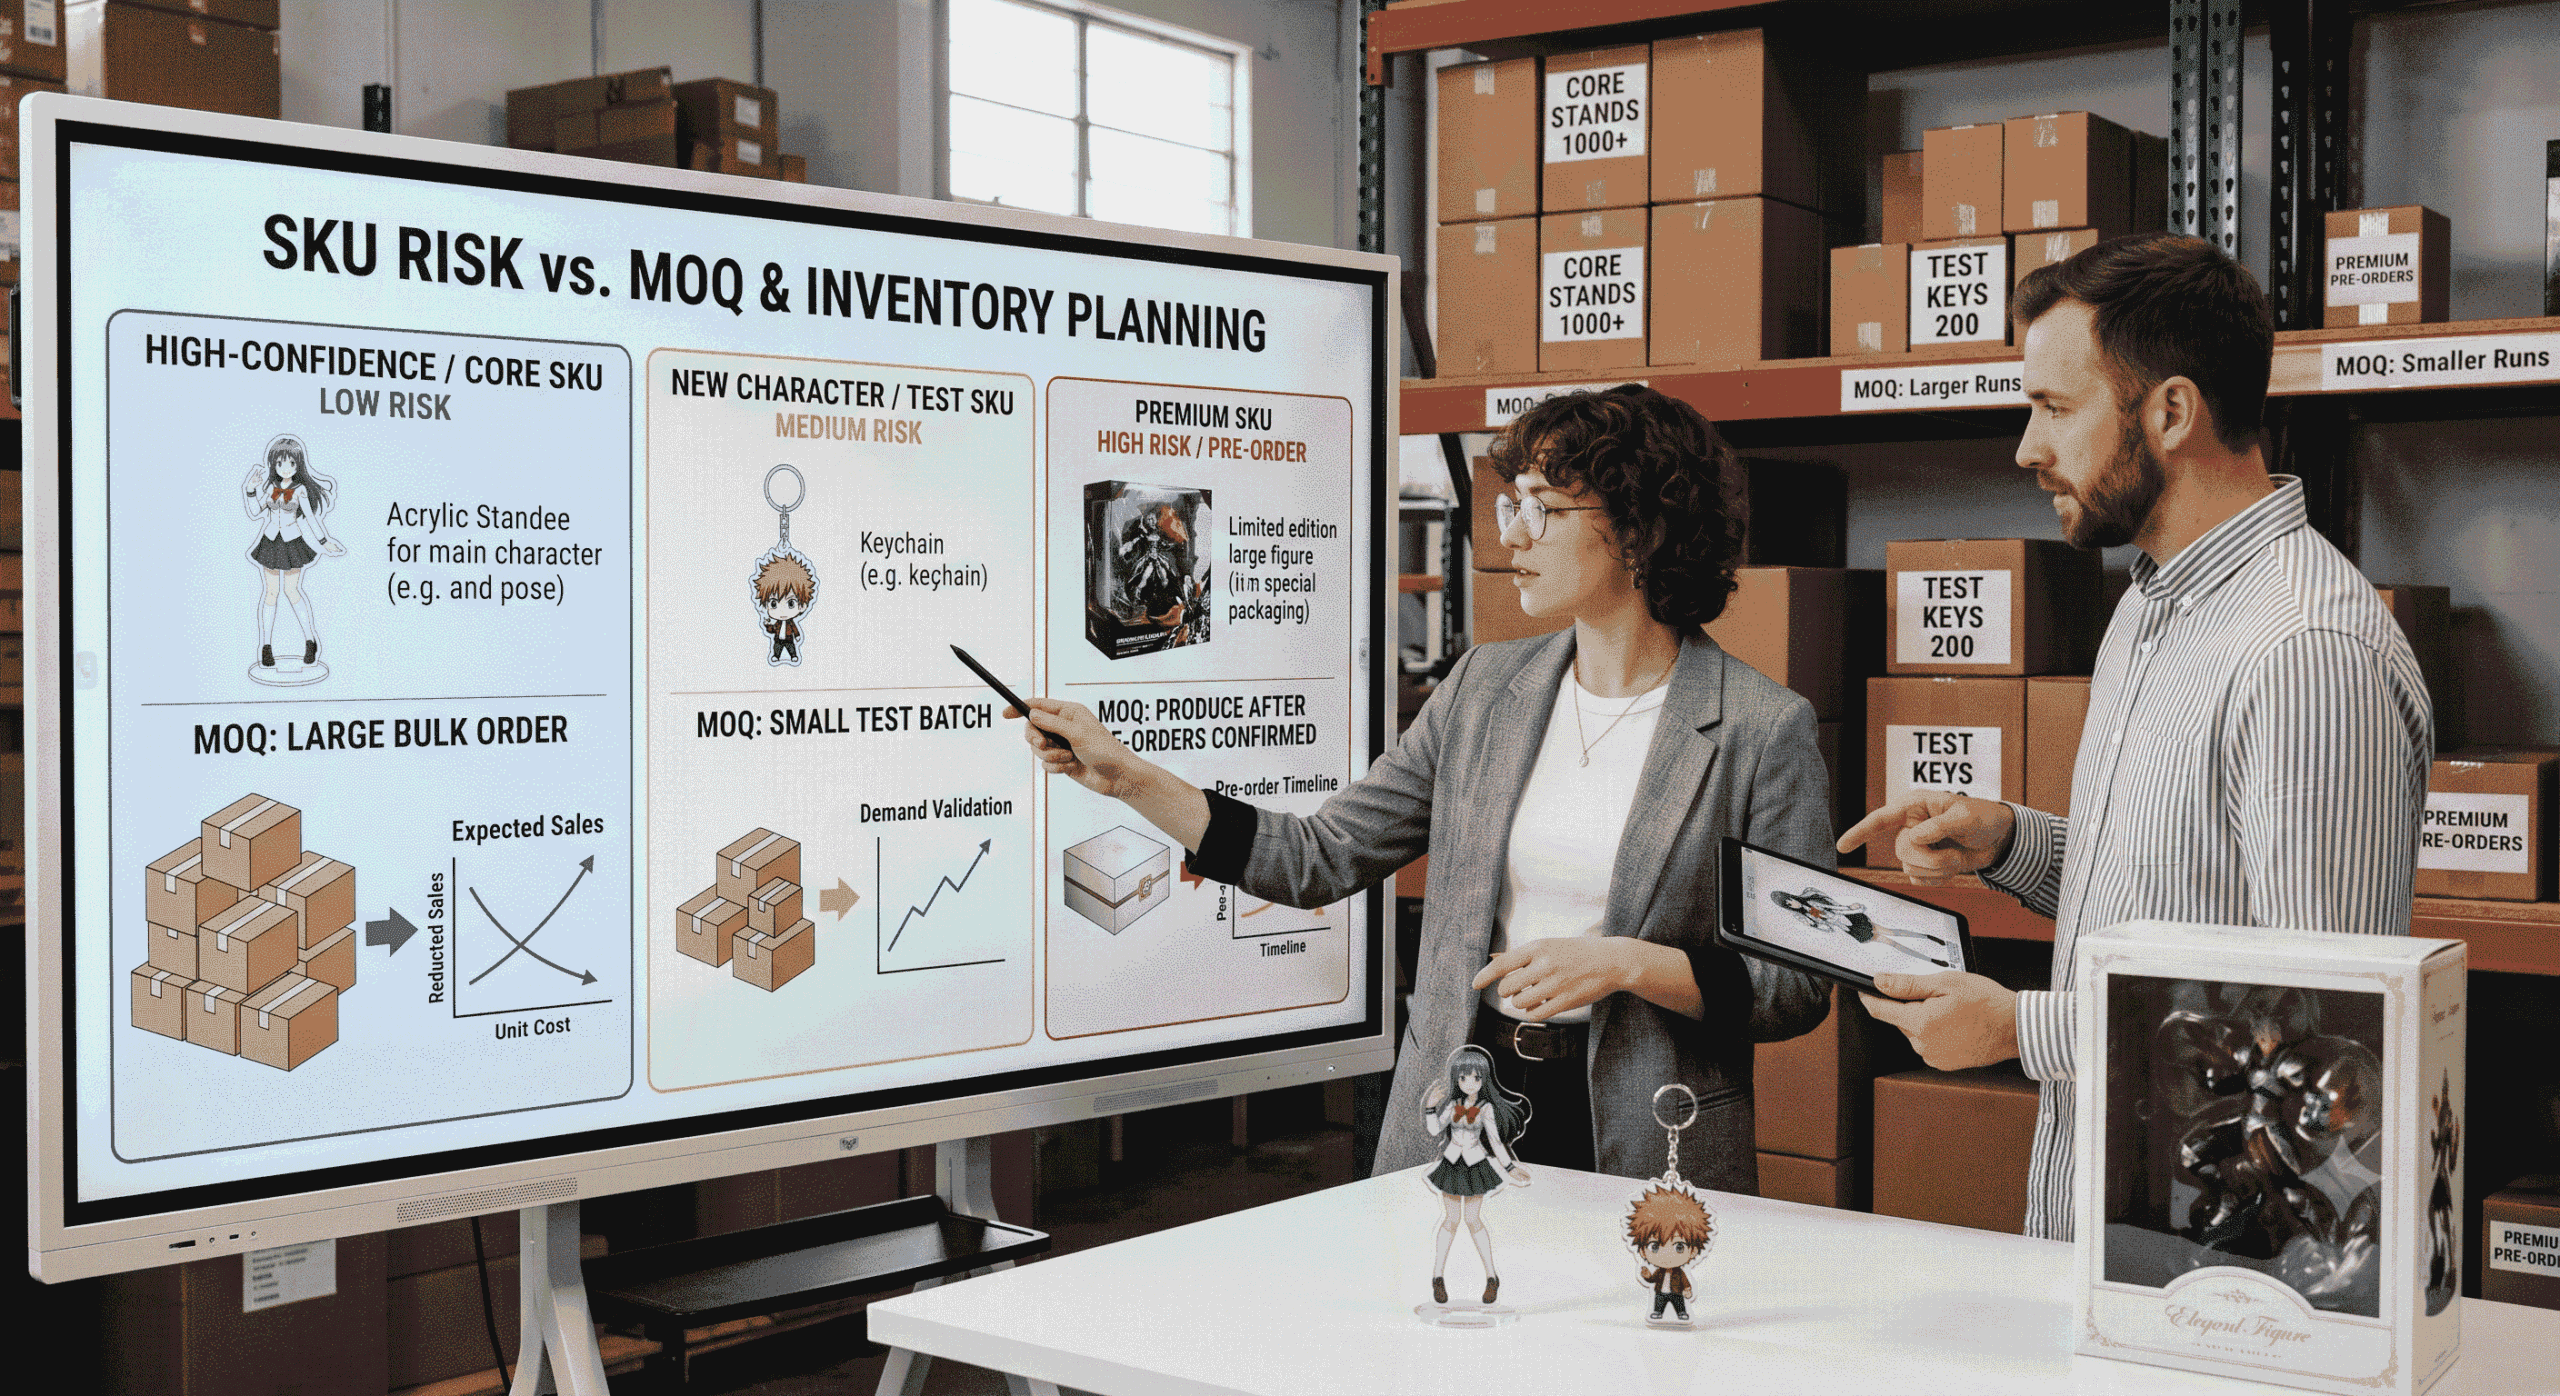
Minimum Order Quantity (MOQ) is often viewed simply as a supplier’s quotation requirement. In professional merchandising, MOQ should follow product risk, not simply production capability.
Your inventory strategy should dictate your manufacturing orders:
-
High-confidence SKUs: (Like the core Acrylic Standee of a main character) You can confidently place a larger bulk order to lower the unit cost and maximize margins.
-
New Characters or Test SKUs: You should start with a smaller test batch to validate consumer demand before committing heavy capital.
-
Premium SKUs: Because of the high cost of goods, these should only be produced once demand is confirmed, perhaps even utilizing pre-orders.
MOQ is an inventory management tool. By balancing large orders for safe SKUs and smaller runs for test SKUs, you protect your cash flow while keeping the product line fresh.
9. Design the Collection for Re-orders
Professional merchandise brands do not operate on a “buy once and forget” model. The ultimate goal of a merchandise line is to establish a lifecycle that generates repeat revenue.
You must build the collection with re-orders in mind:
-
Phase 1 – Launch: Introduce the character with a focused line (1 hero product, 2–3 supporting products).
-
Phase 2 – Check: Analyze the sales data. Identify the best-selling product format, the most popular artwork, and the price point with the highest conversion rate.
-
Phase 3 – Re-order: Restock the winning SKUs in larger volumes to capture ongoing demand.
-
Phase 4 – Expand: Once the core line is proven, introduce new variables. Add a new character pose, a new product category (like apparel), or a special limited-edition variant.
This transforms product development from a blind gamble into data-driven commodity lifecycle management.
10. Example: One Character, Seven Products
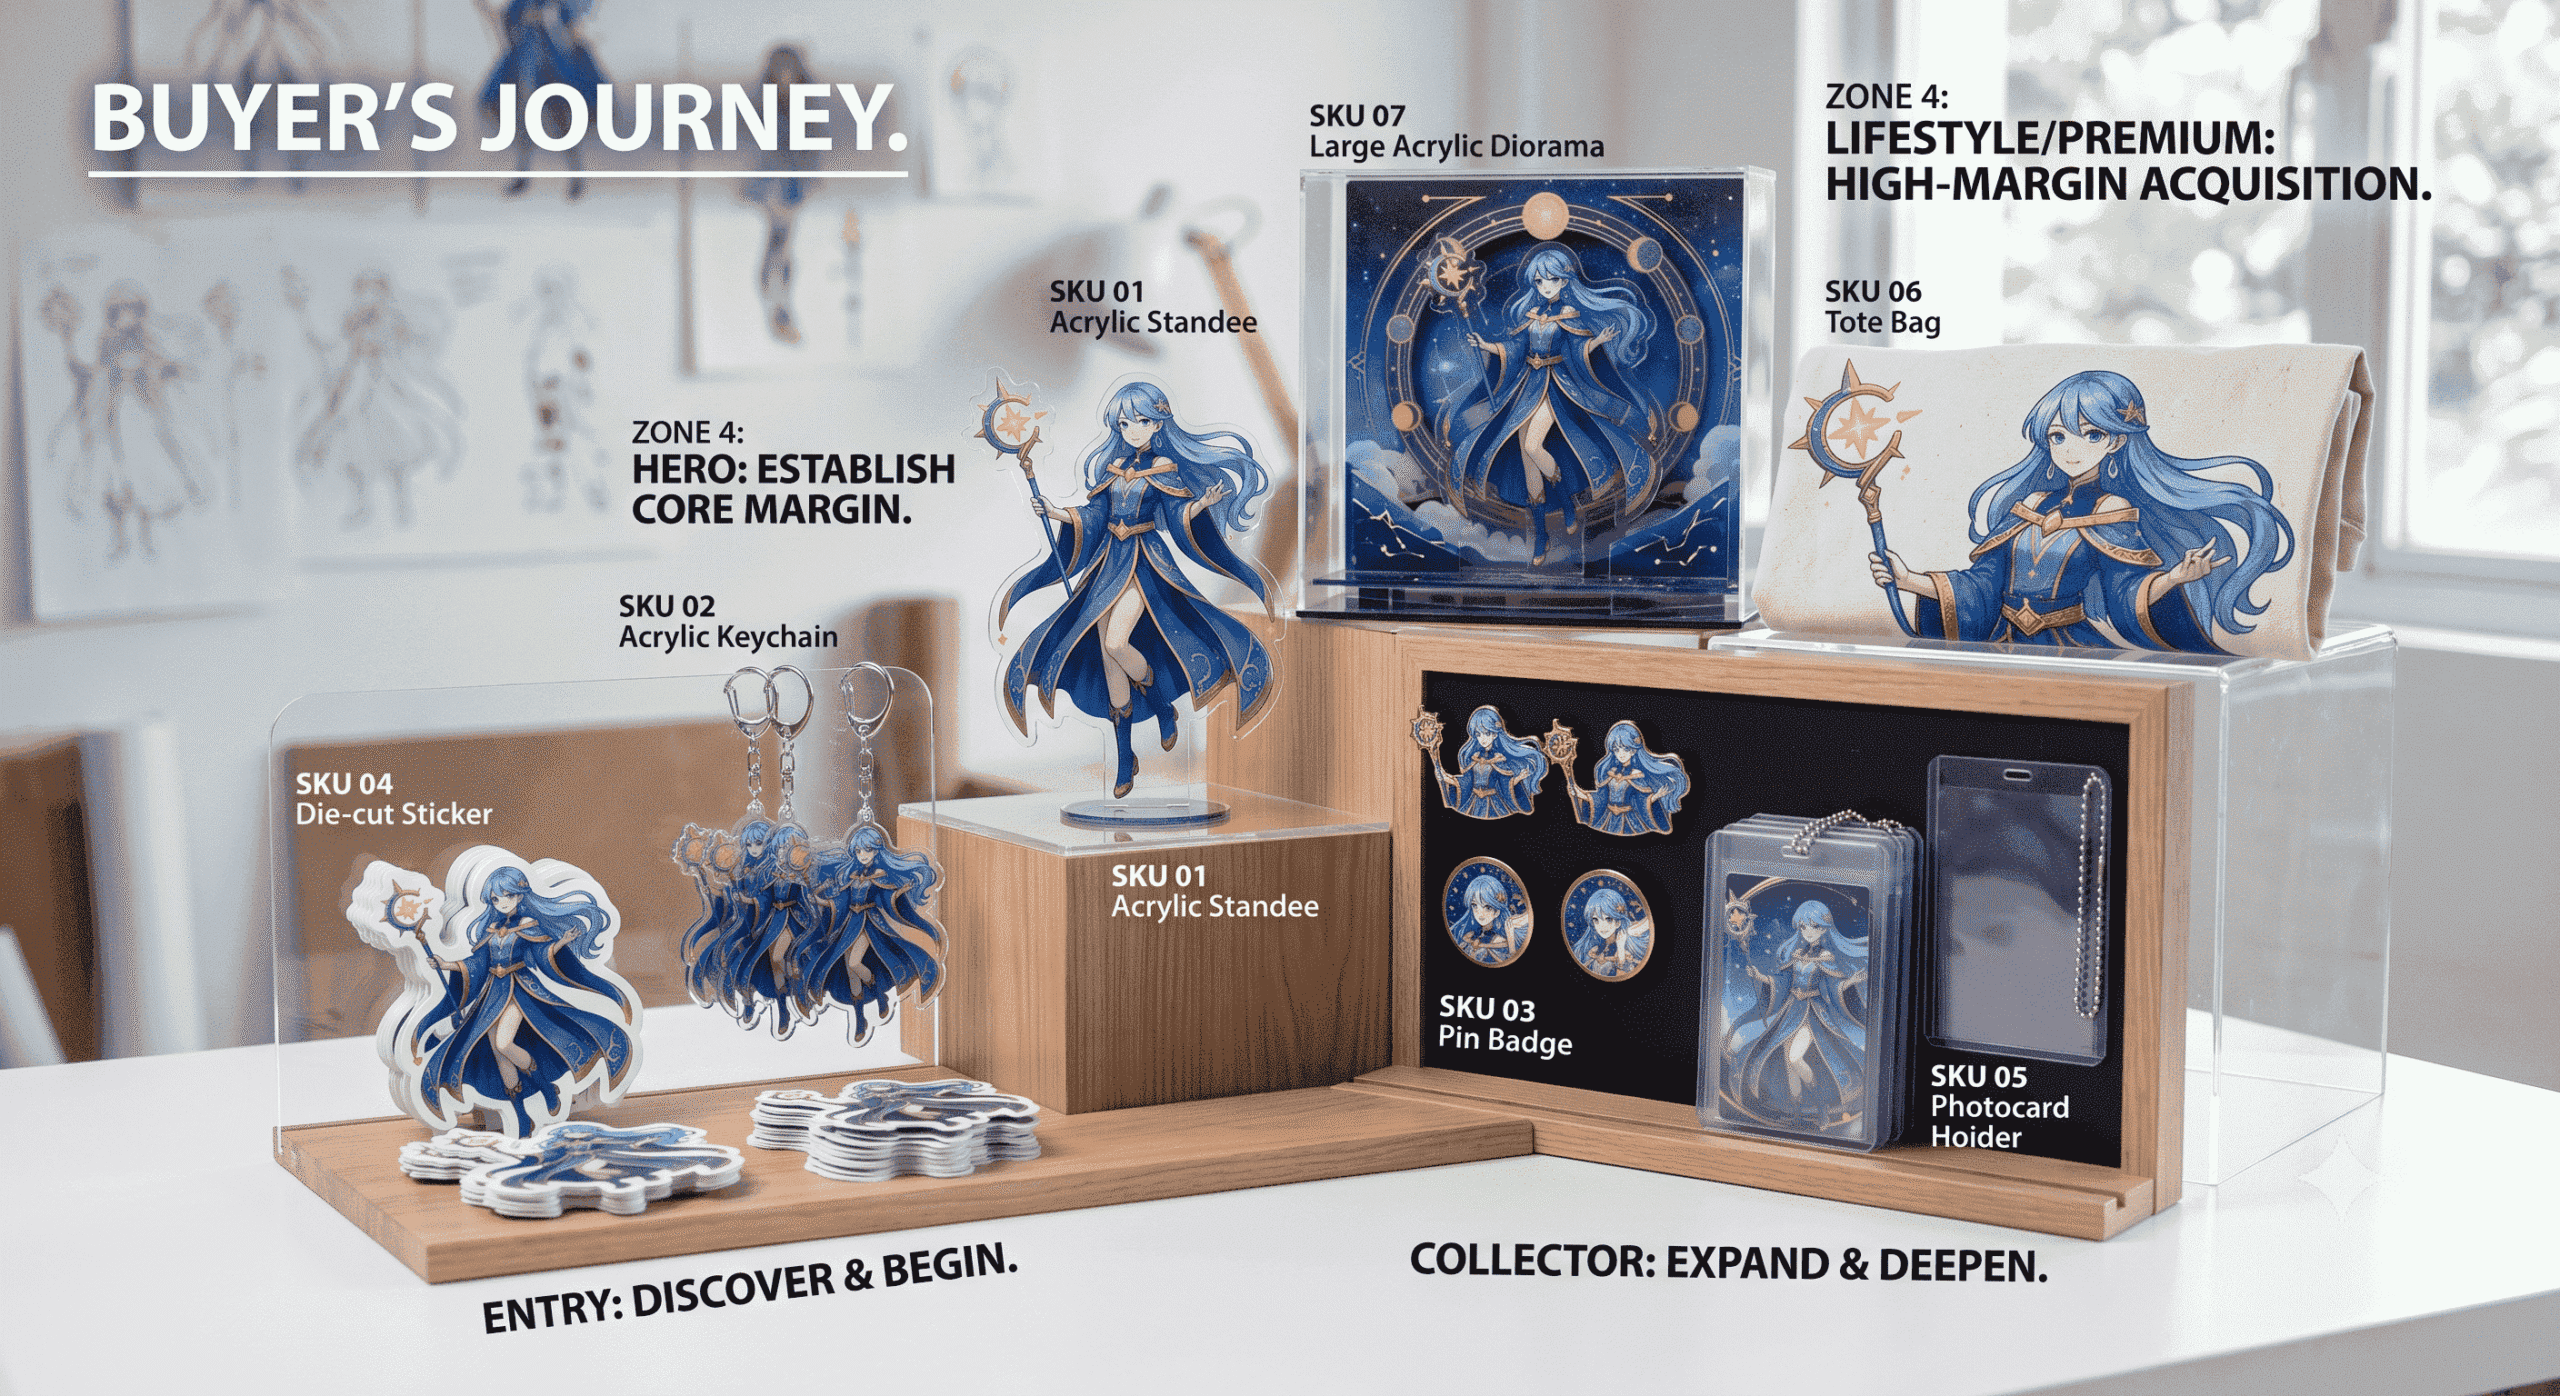
To see how this methodology works in practice, let’s look at a hypothetical 7-SKU merchandise line built around a single character.
Notice how every item serves a specific commercial purpose, creating a complete retail ecosystem:
| SKU | Product Format | Commercial Role | Price Strategy |
| 01 | Acrylic Standee | Hero | Core Margin |
| 02 | Acrylic Keychain | Entry | Volume / Impulse |
| 03 | Pin Badge | Collector | Volume / Impulse |
| 04 | Die-cut Sticker | Impulse | Add-on Item |
| 05 | Photocard Holder | Fan Accessory | Utility / Trend |
| 06 | Tote Bag | Lifestyle | Mid-Tier Margin |
| 07 | Large Acrylic Diorama | Premium | High Margin / Low Volume |
The Buyer’s Journey:
The fan might discover the character and buy the Keychain and Sticker (Entry).
As they grow more attached, they purchase the Acrylic Standee (Hero).
They return later for the Pin Badge and Photocard Holder (Collector) to round out their collection.
Finally, they buy the Tote Bag (Lifestyle) to show off their fandom in daily life, or save up for the Large Diorama (Premium).
One character has now generated multiple sales across different product categories.
11. When Should You Add More Products?
A common question for merchandising teams is knowing exactly when to expand the line.
Add More SKUs When:
-
One product consistently sells out and generates waitlists.
-
Customers explicitly ask for related products on social media or via customer service.
-
The IP owner releases new, highly anticipated artwork for the character.
-
Retail partners request new items to fulfill repeat demand.
-
The existing collection has clear price gaps (e.g., you have $5 items and $50 items, but nothing in the $20 range).
-
Your manufacturing partner has proven they can maintain consistent quality at scale.
Don’t Add More SKUs When:
-
The first product launch has no clear bestseller.
-
Inventory for the initial run remains high.
-
Every SKU is selling slowly.
-
You are forced to order uncomfortably large quantities just to test a new format.
-
The proposed new products do not serve a clear, distinct customer need compared to what you already offer.
12. Work With a Manufacturer That Can Scale the Line
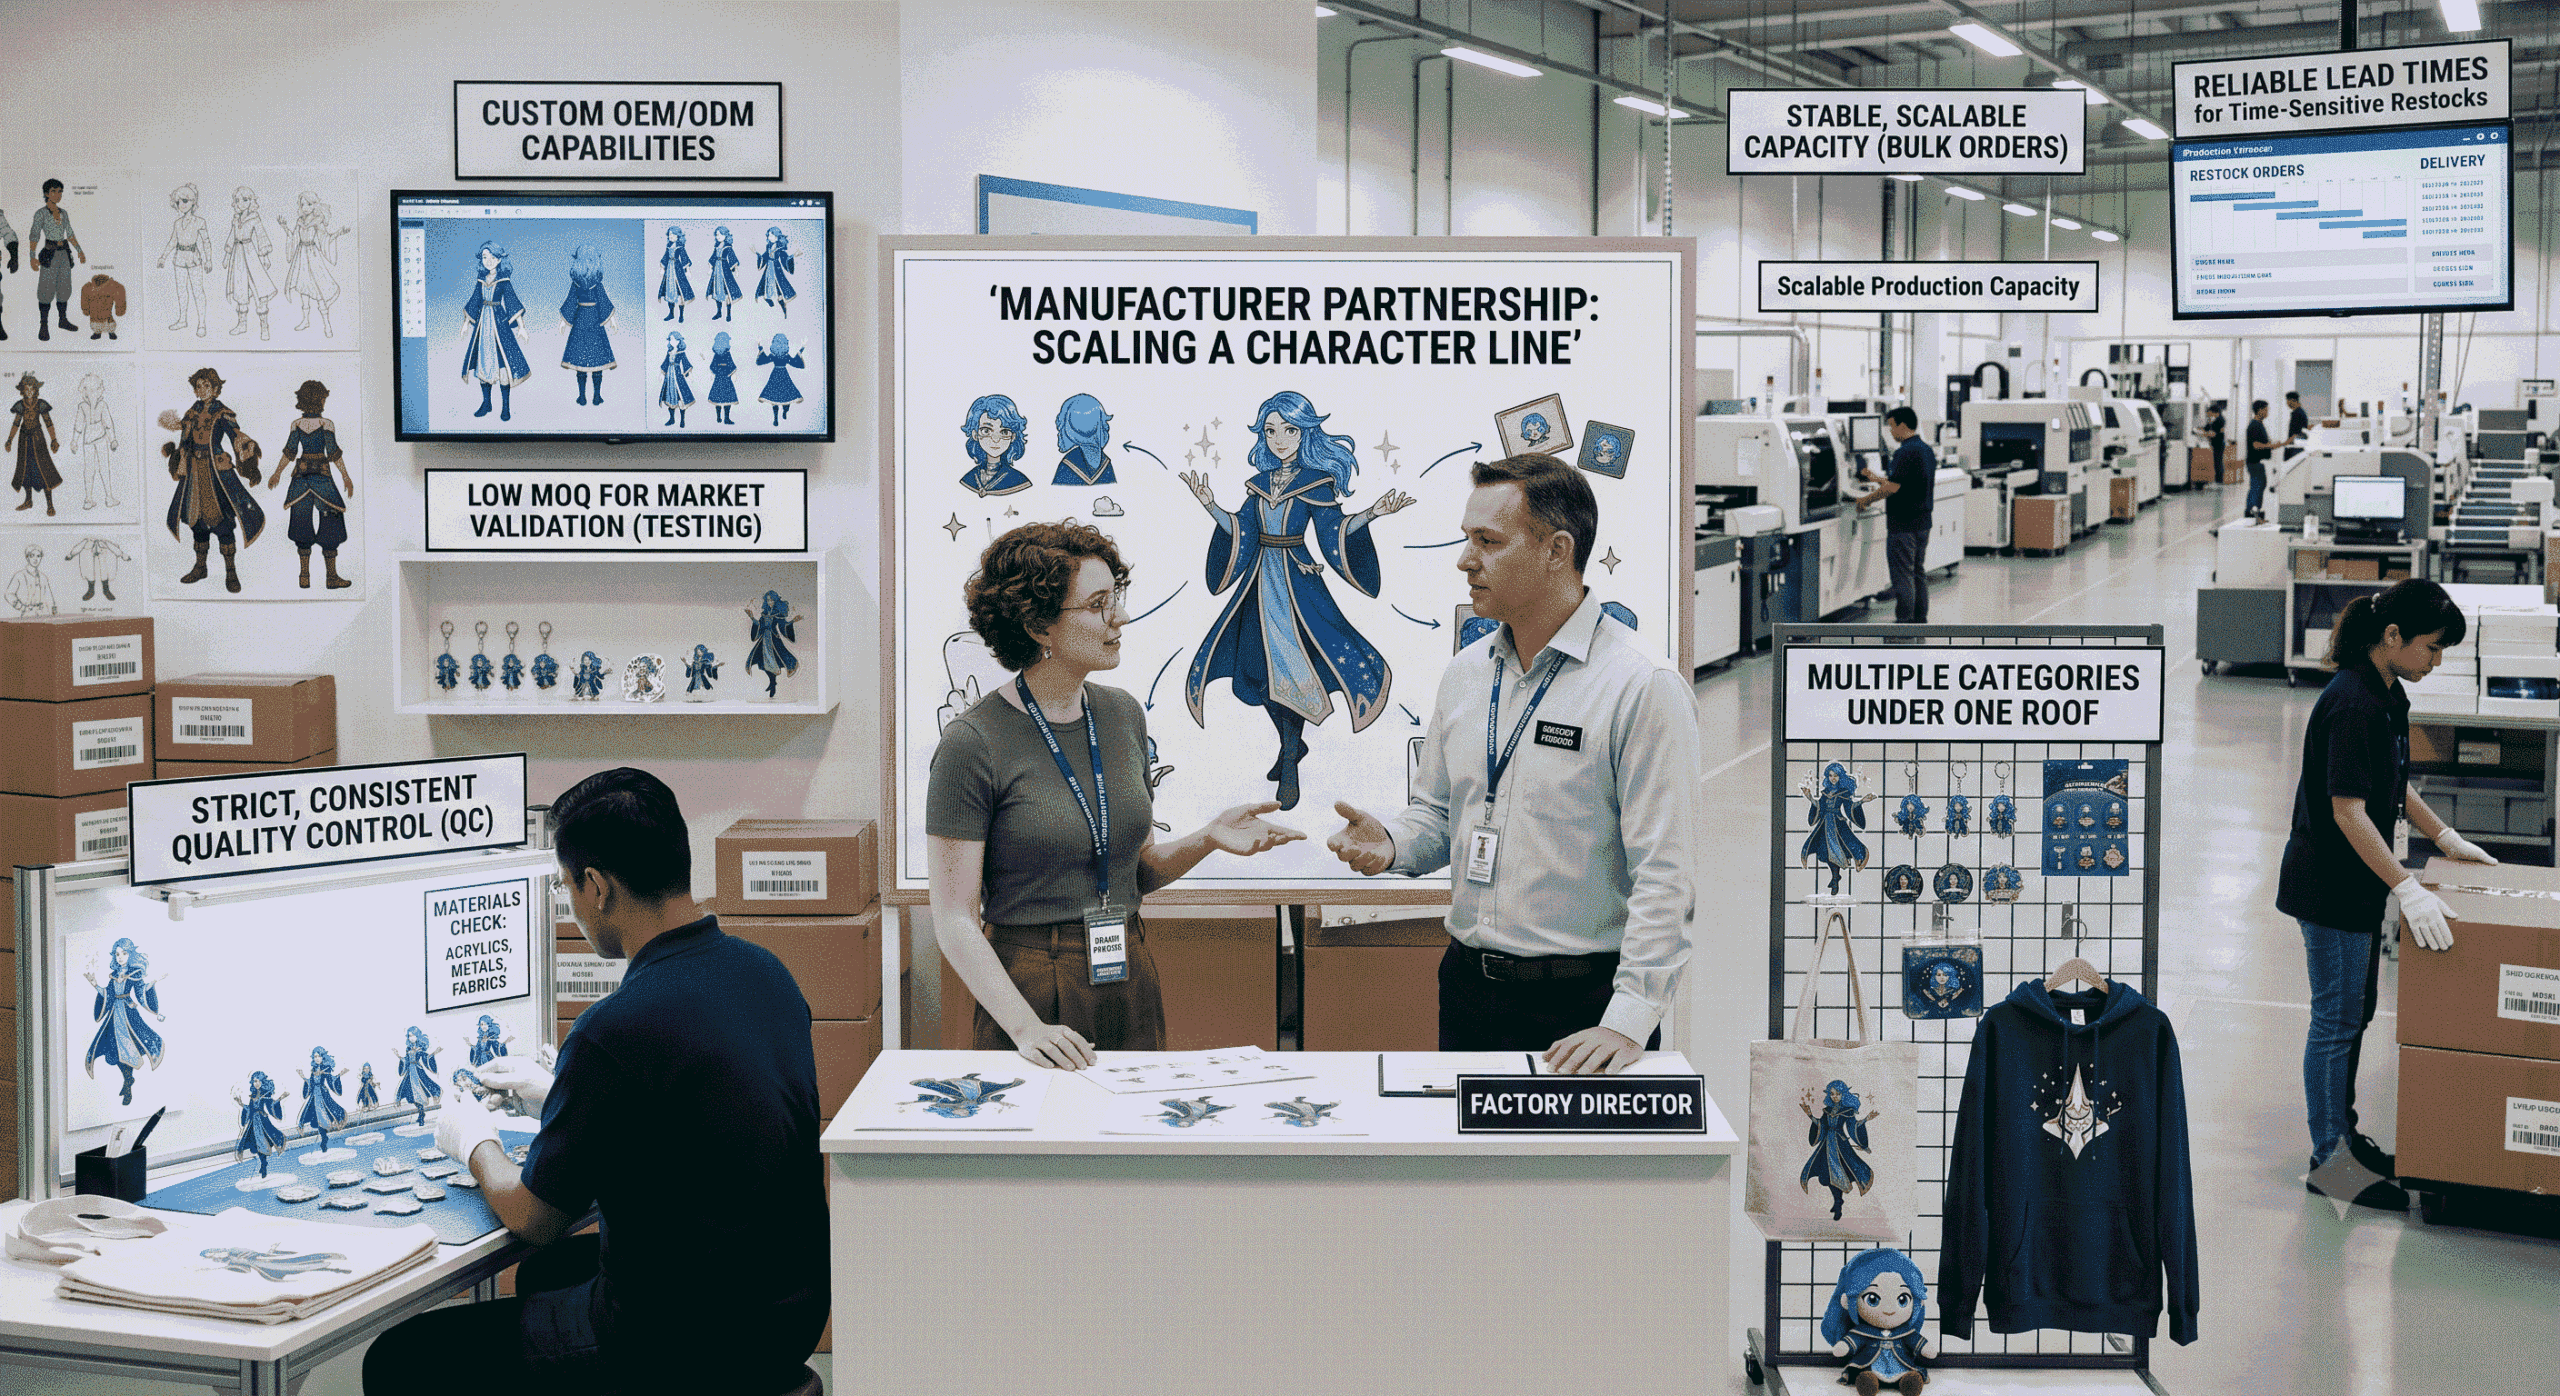
When you build a character-based merchandise line, your supplier needs to be capable of supporting more than just a one-off product.
You may start with a small test order and later need to add new artwork, develop new SKUs, unify packaging, or scale up to massive repeat bulk orders. A rigid factory will stall your growth; a flexible manufacturing partner will accelerate it.
Look for a manufacturer that can actively support:
-
Custom manufacturing and OEM/ODM capabilities
-
Low MOQ for product testing and market validation
-
Strict, consistent quality control across different materials
-
Multiple product categories under one roof (acrylics, metals, fabrics)
-
Stable production capacity as your brand scales
-
Reliable lead times for time-sensitive retail restocks
At BOCE GIFTS, we help B2B buyers develop character-based merchandise lines across acrylic, apparel, metal accessories, and promotional products. From initial prototyping and small test batches to high-volume bulk production and seamless repeat orders, we provide the manufacturing backbone you need to turn a single character into a thriving commercial success.
Conclusion
Developing an anime merchandise line requires more than just picking a popular character and printing them on a keychain. It requires a disciplined approach to product roles, pricing tiers, artwork adaptation, and inventory risk.
By starting with a focused “Hero + Supporting” launch, understanding the commercial job of every SKU, and planning for data-driven re-orders, you can transform a single piece of character art into a highly profitable, scalable retail collection.