If you want to create stunning merchandise that your customers and fans will love, you need to know a few insider manufacturing secrets. Whether you are prepping for an upcoming convention or looking to stock up your store, we have put together this complete guide to help you master everything about designing and producing the perfect acrylic keychain.
What Makes High-Quality Custom Clear Acrylic Keychains?
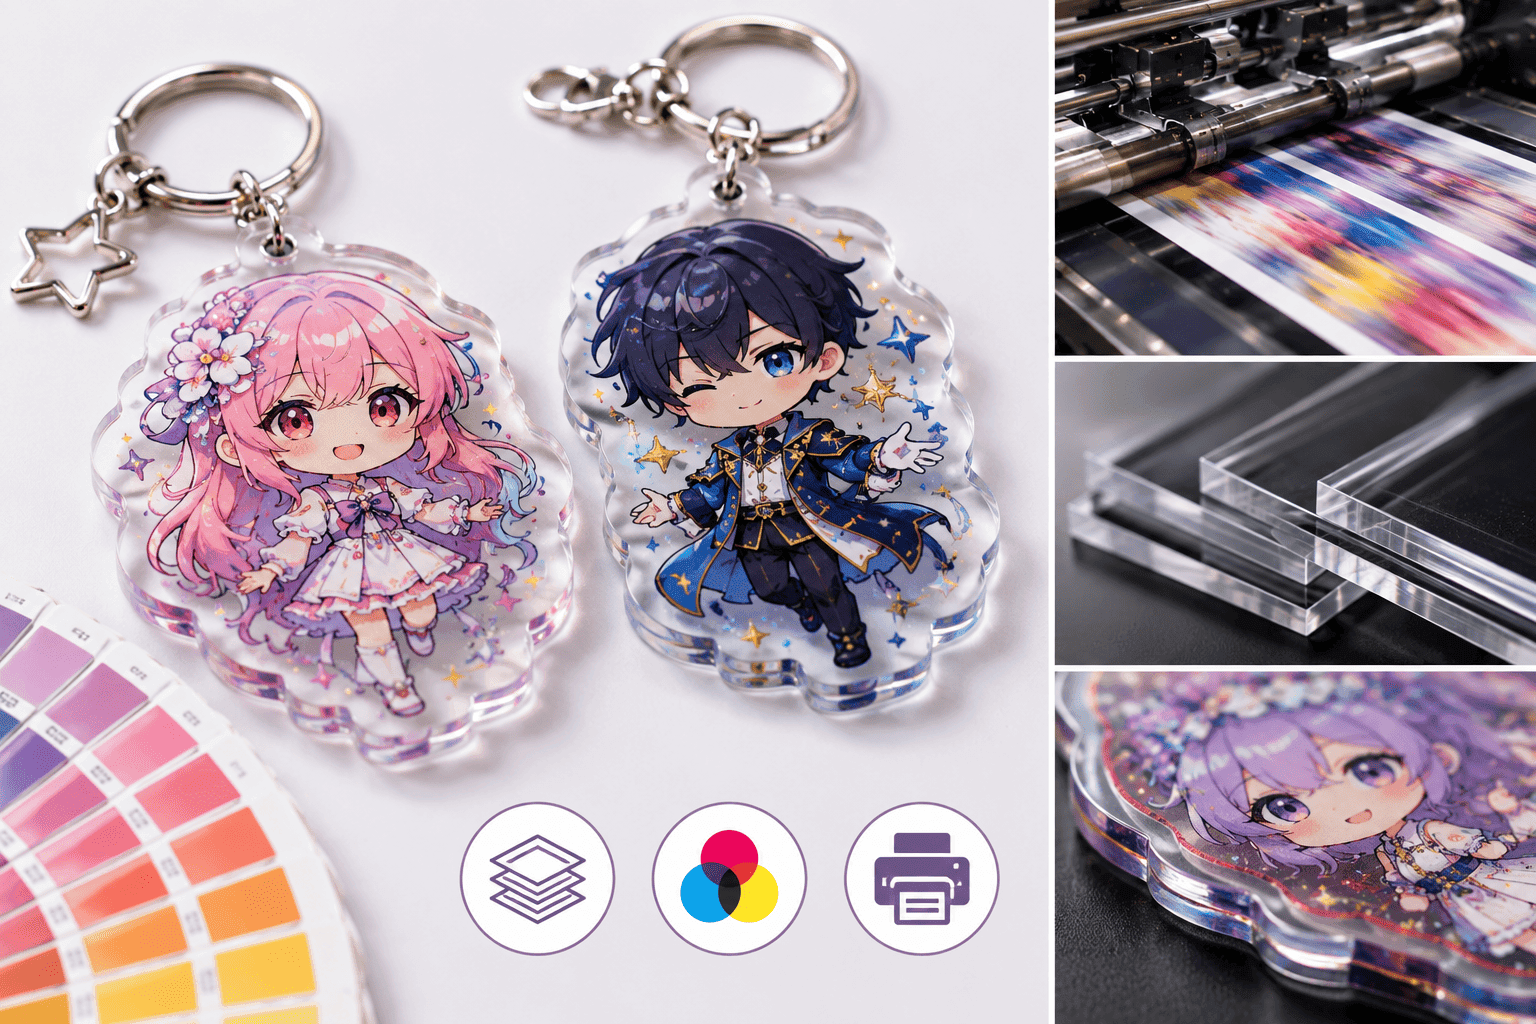
Premium Materials and Printing Options
If you want great quality, you have to invest a bit more. When we pair top-notch materials with excellent printing equipment (like offset printing), you get outstanding color reproduction. Sure, it costs more than standard UV printing, but the results make your products stand out.
Ideal Thickness: Why We Recommend 4mm
You want your product to feel substantial. We personally think 3.5mm or thicker gives you that premium feel you are looking for. Whenever possible, we highly recommend going with 4mm.
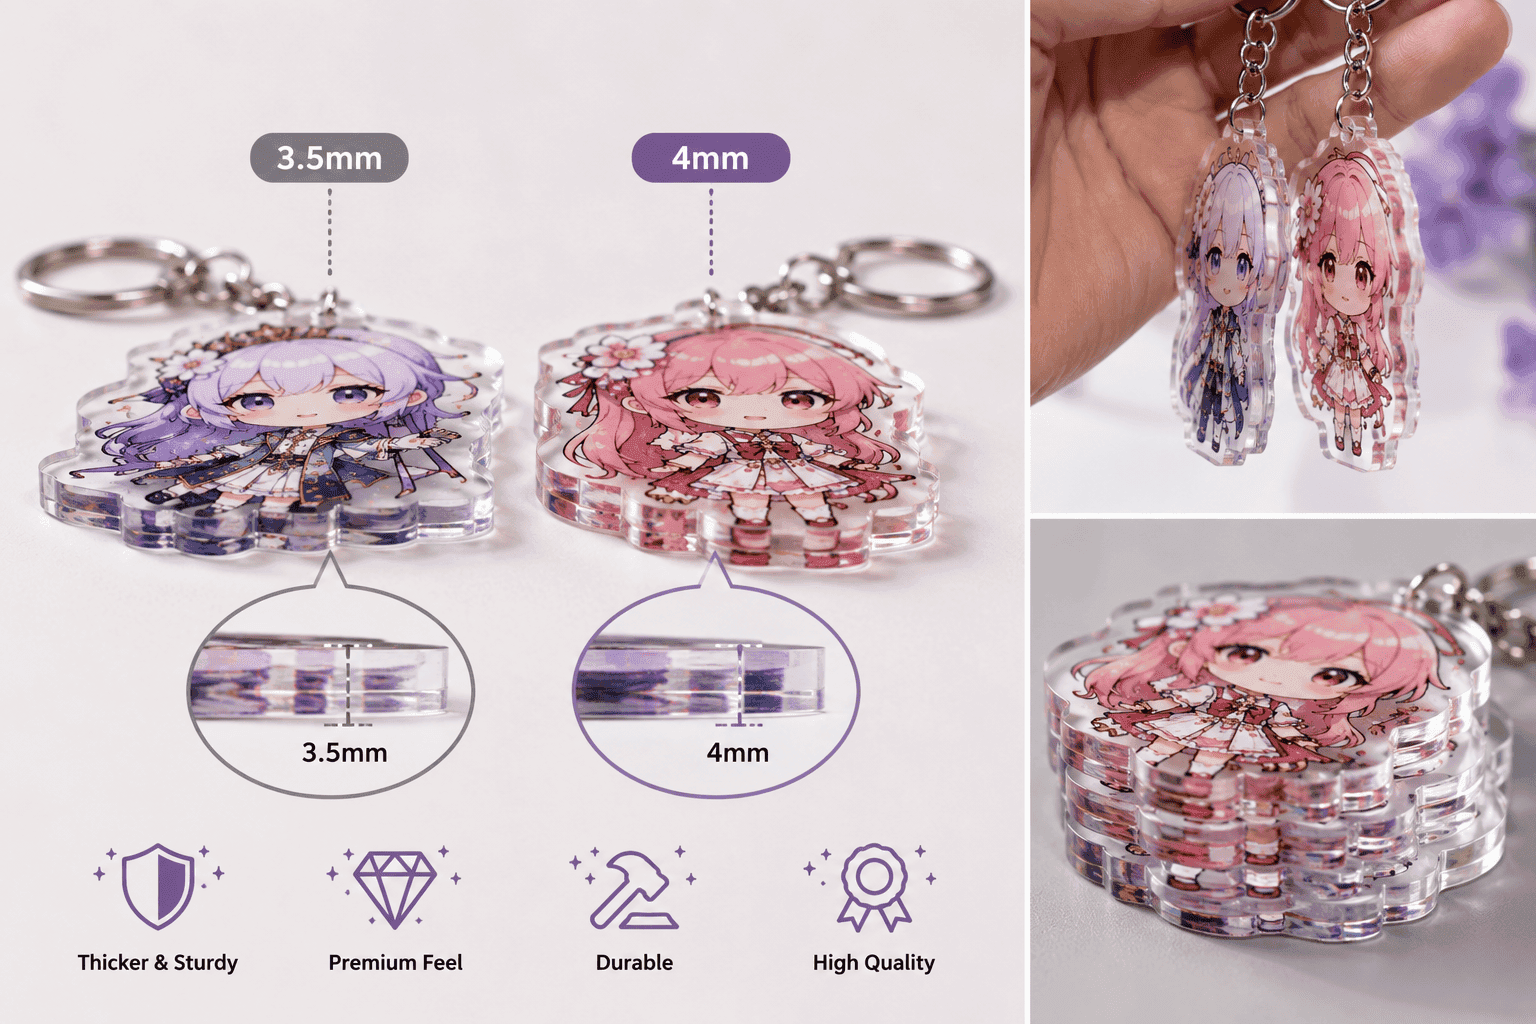
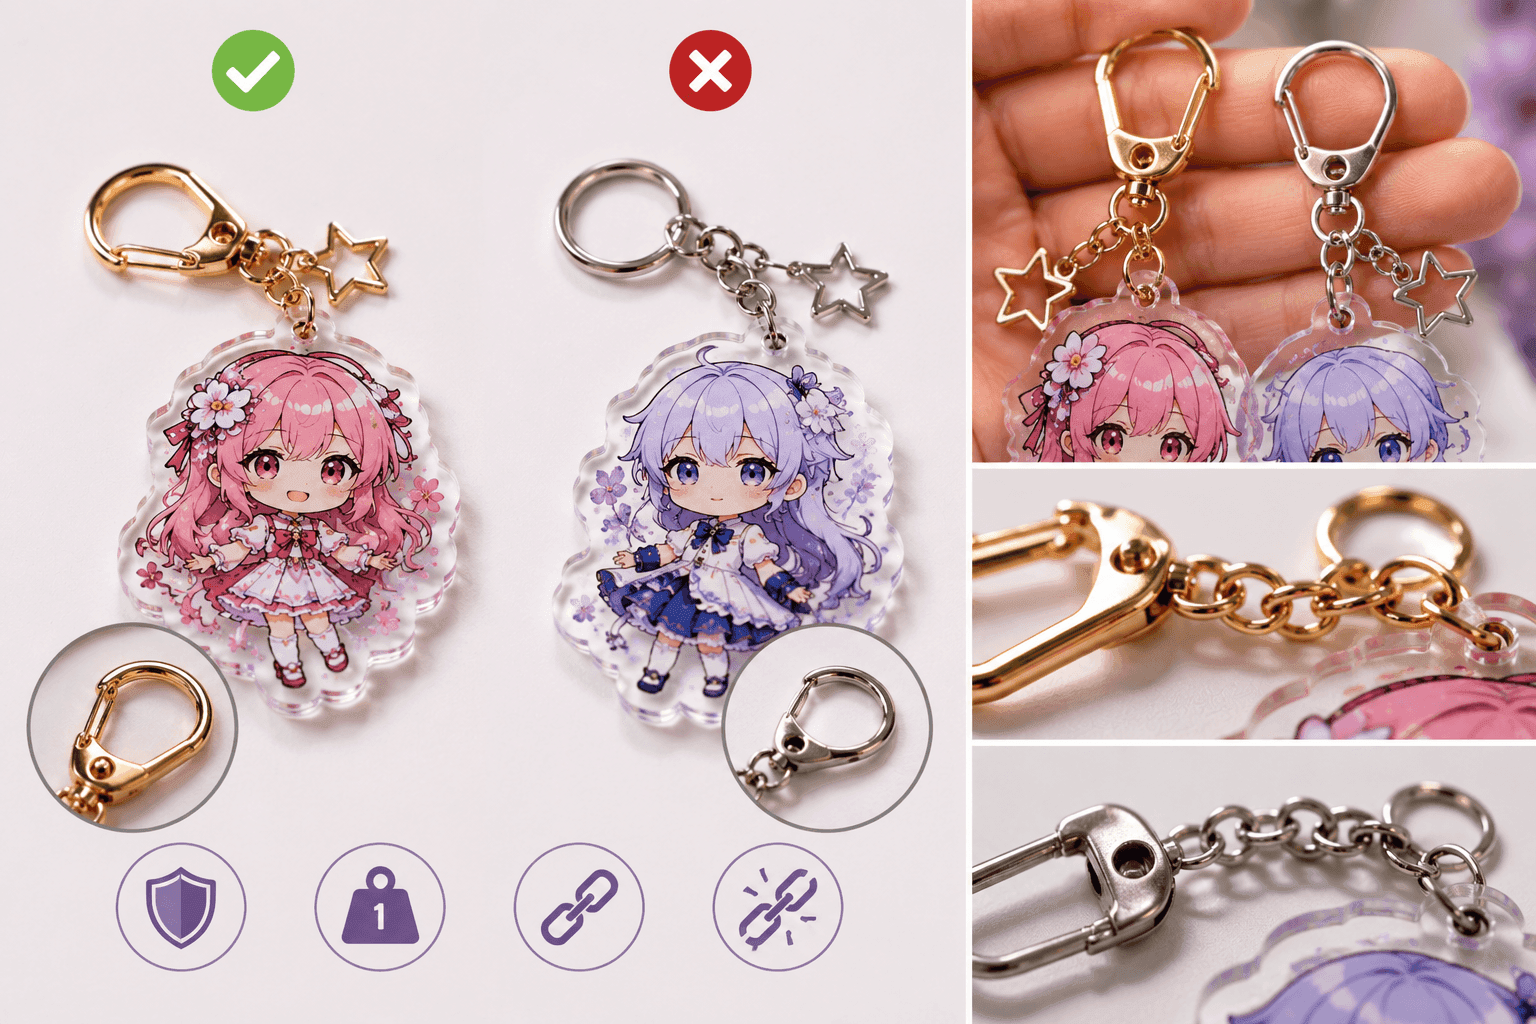
Don’t Ignore the Metal Hardware
Your metal chain matters a lot! Good clasps feel solid and heavy in your hand, while cheap ones are brittle, snap easily, and ruin the overall customer experience.
Choosing the Perfect Size for Your Acrylic Keychain
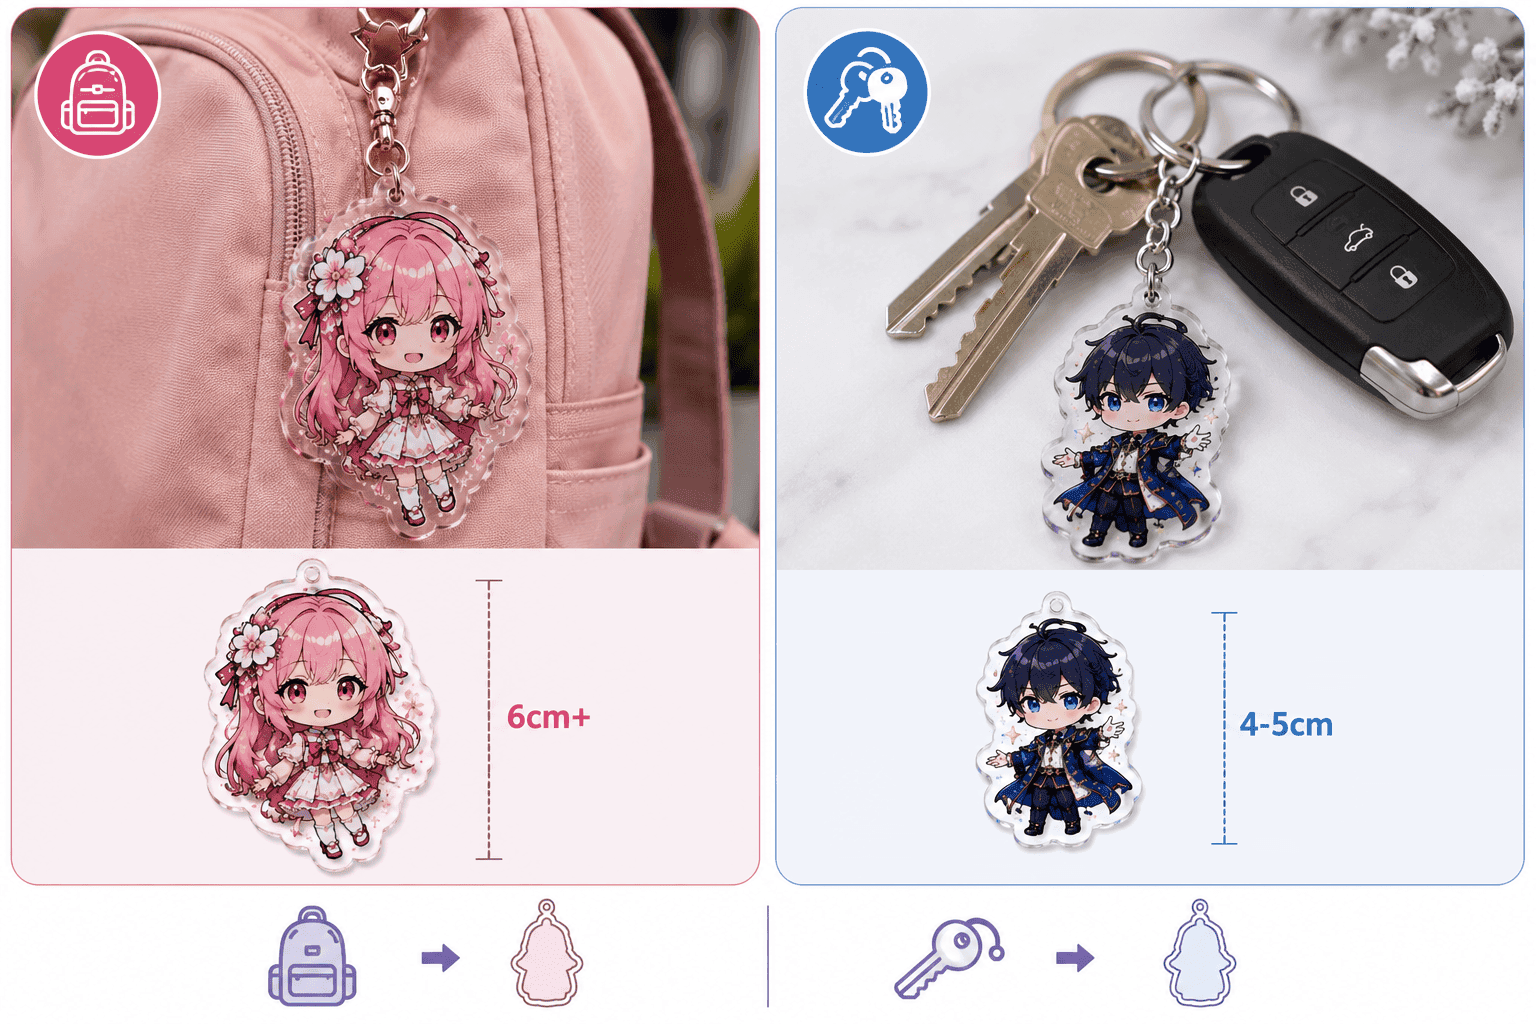
Size Recommendations for Backpacks vs. Key Rings
Think about how your end-users will use the product:
-
Backpack charms: We suggest you make them 6cm or larger.
-
Key rings: 4-5cm is totally fine for hanging on daily keys.
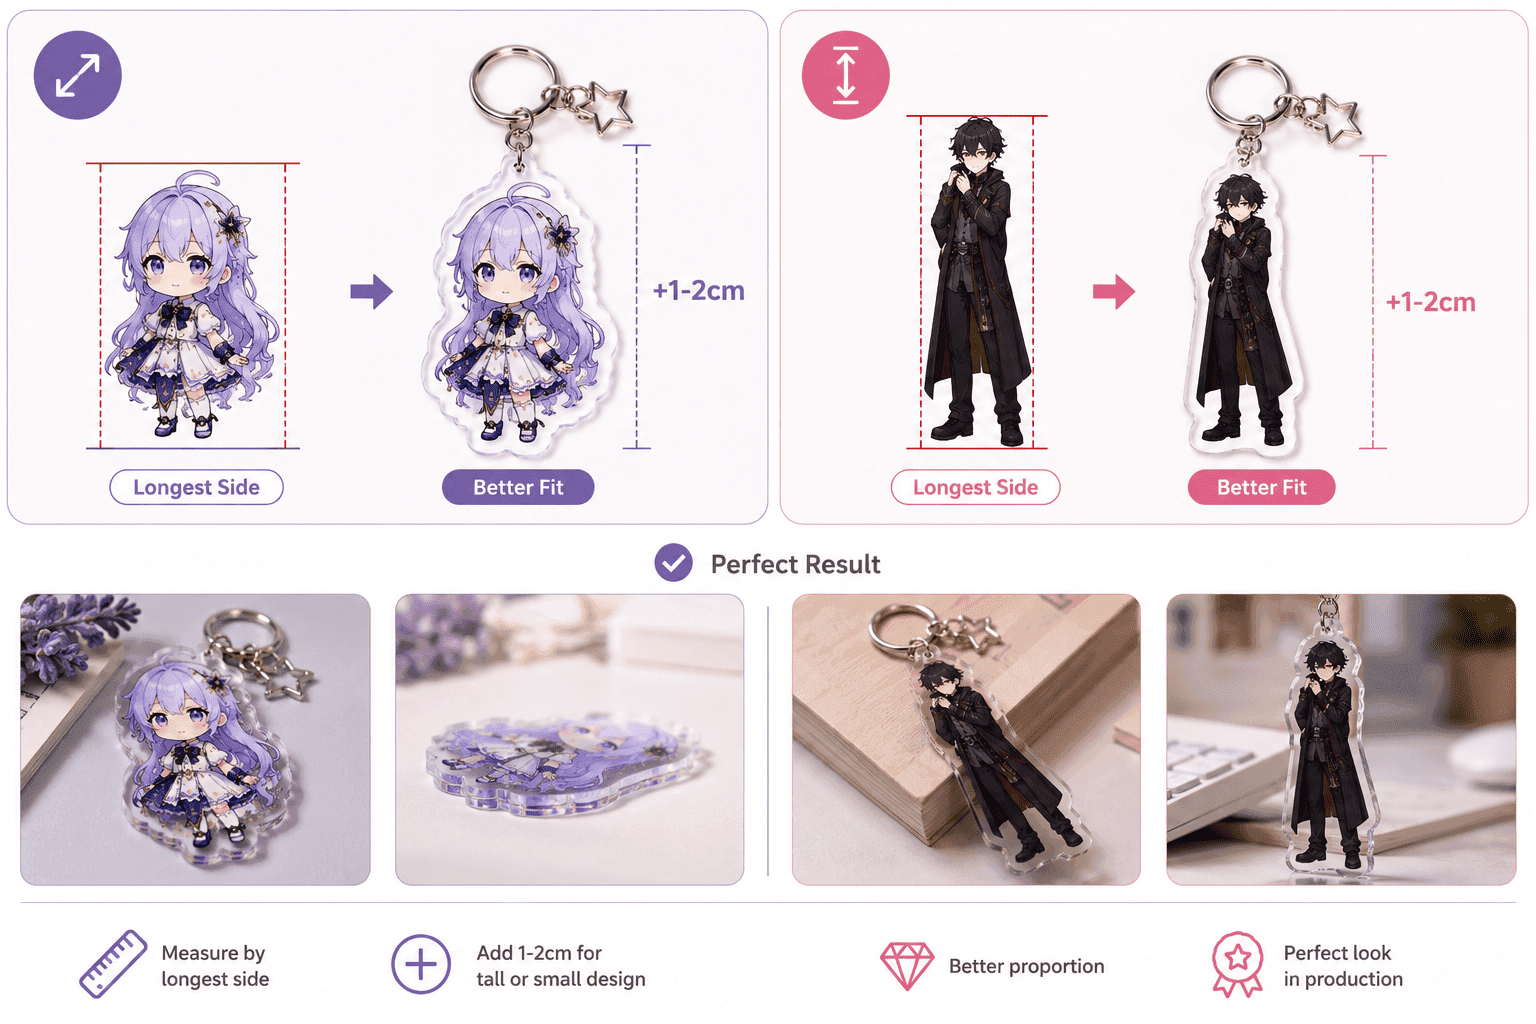
How to Adjust Dimensions Based on Your Design
We usually calculate the size based on the longest side of your image. However, if your artwork is super tall and skinny, or if your character looks smaller after you tweak the design, you should add 1-2cm to your target size. This ensures your Custom Clear Acrylic Keychains look absolutely perfect when they come off the production line.
Solving Common Manufacturing Issues in Bulk Acrylic Keychains
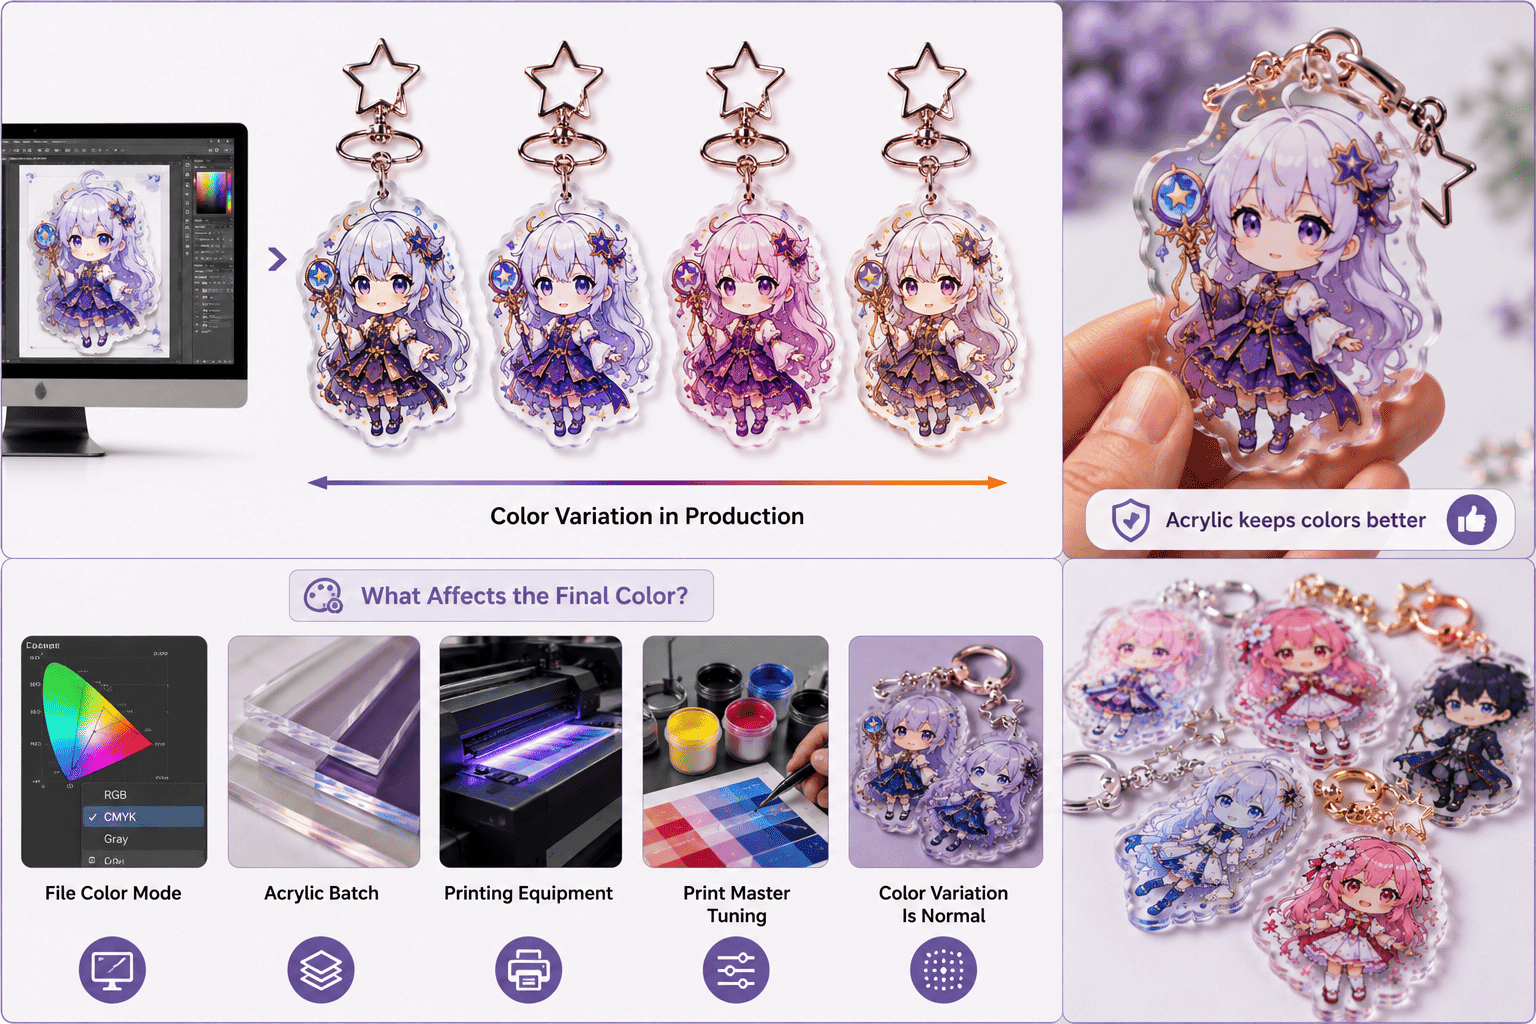
How to Handle Color Differences
This is the toughest nut to crack in manufacturing. Many things affect your final colors: the color mode of your file, the specific acrylic batch, our equipment, and even our print master’s tuning habits. (Note: Luckily, acrylic products actually keep their colors much better than paper products!)
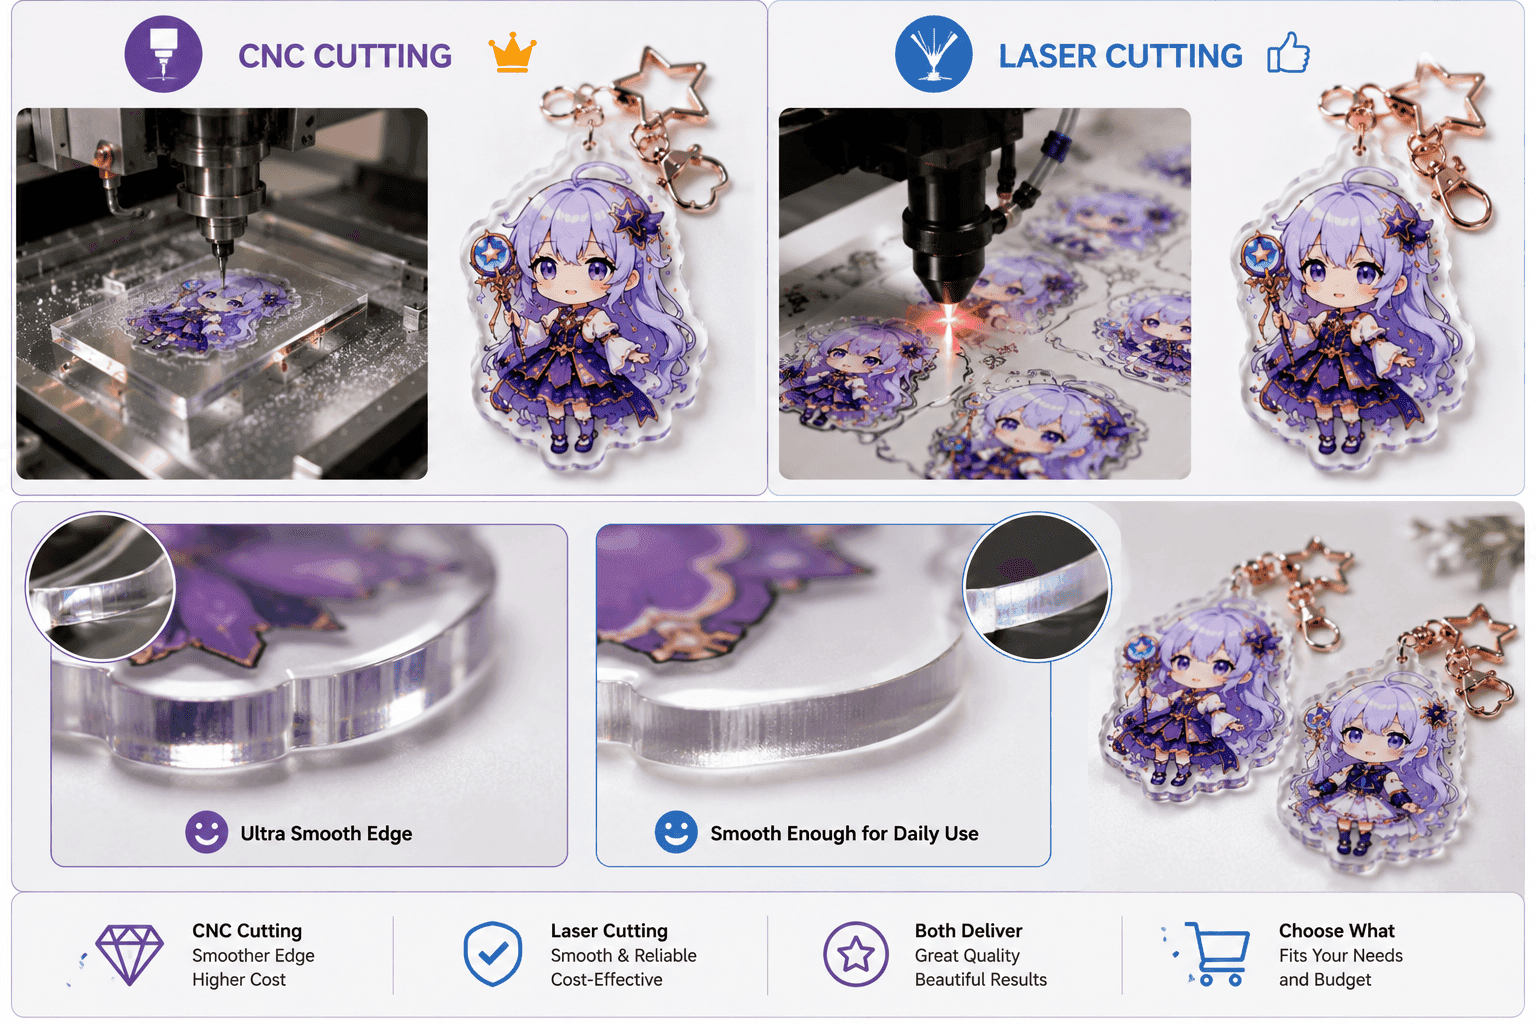
CNC Cutting vs. Laser Cutting for Smooth Edges
We generally use laser cutting or CNC cutting to shape your items.
-
CNC cutting gives you incredibly smooth edges, but it costs more.
-
Laser cutting, honestly, gives you enough smoothness for your everyday standard items.
Setting the Right Clear Border for Your Design
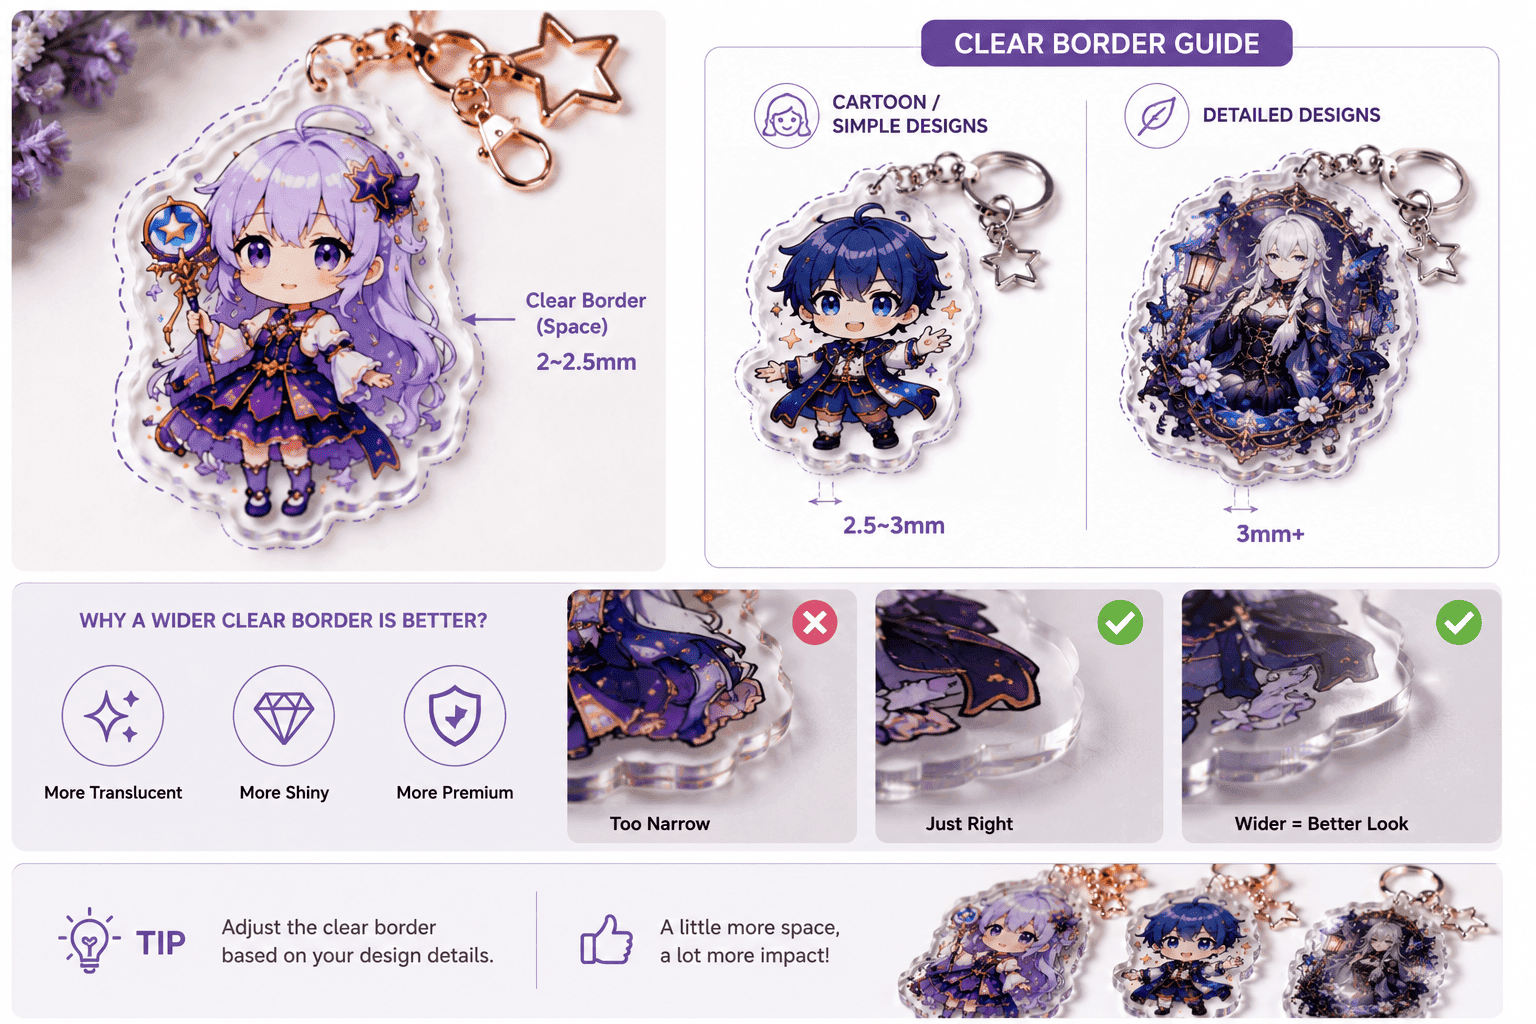
The clear border is the space you leave between your printed design and the outer cut edge. We usually leave a 2-2.5mm border by default, but you should adjust this:
-
For cartoon characters, leaving about 2.5-3mm works great.
-
For highly detailed designs, you need to leave a thicker border to make the whole piece look cohesive.
-
Aesthetic advice: That crystal-clear look is the best part of acrylic. If you widen the clear border just a bit, your charm will look incredibly translucent and shiny.
Advanced Techniques for Custom Anime Keychains

Single-Board vs. Double-Board (Sandwiched) Acrylic
It’s all about how well you protect your design.
-
Single-board: We print on the back, leaving the ink layer exposed. If you hang it on your bag, your keys or zippers will easily scratch it and ruin your design.
-
Double-board (Sandwiched): We perfectly “sandwich” your printed design between two acrylic boards. This completely stops any scratching, and both sides feel completely smooth like glass.
-
Our suggestion: If you are making collectible merch, like Custom anime keychains to sell or bring to an event, we strongly advise you to spend a little extra on the double-board process. Your merch will last much longer and feel way more premium.
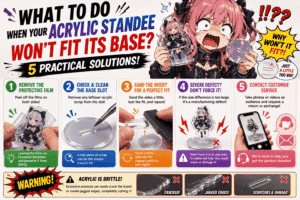
Why Cheaper Acrylic Turns Yellow and Warps
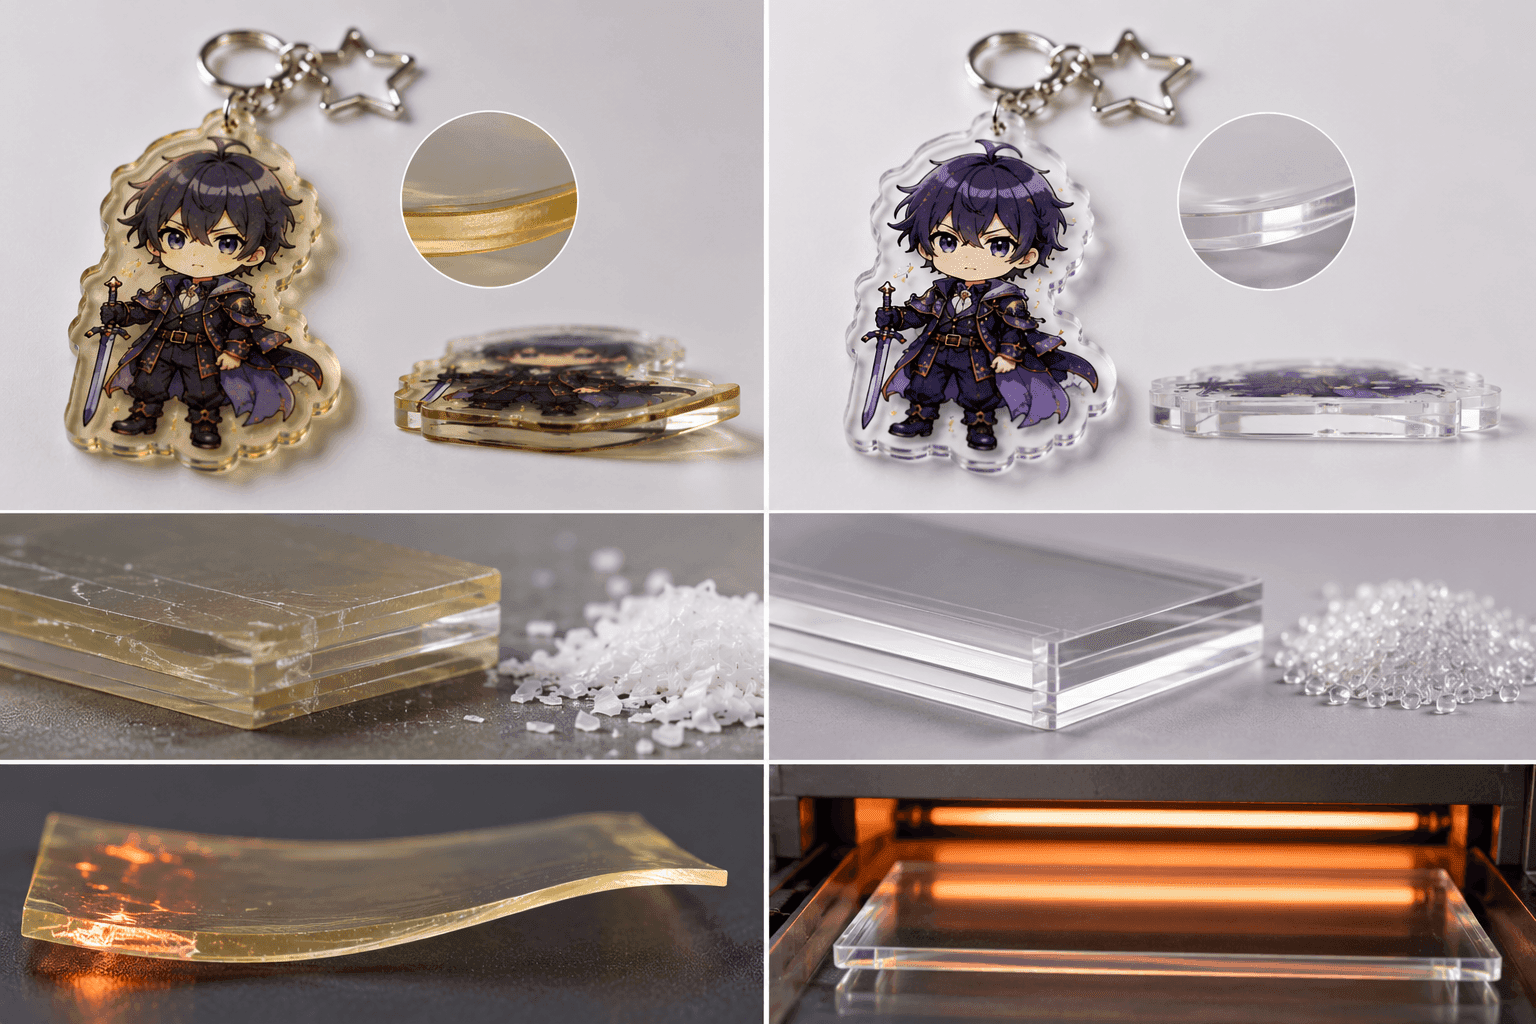
Pay close attention to the grade of the acrylic board. Some cheap factories use recycled materials to cut costs. Recycled boards give you poor light transmission right from the start, and they turn yellow very quickly. Worse, they warp and bend super easily when temperatures change.
When you order bulk acrylic keychains, you must clearly tell us to use “high-transparency brand new materials.” Also, make sure the cutting process includes proper annealing to release the internal stress of the board, which stops warping right from the start.
Adding Epoxy, Holographic Film, and Foil Stamping
We can layer different material effects to create a massive visual impact for your audience:
-
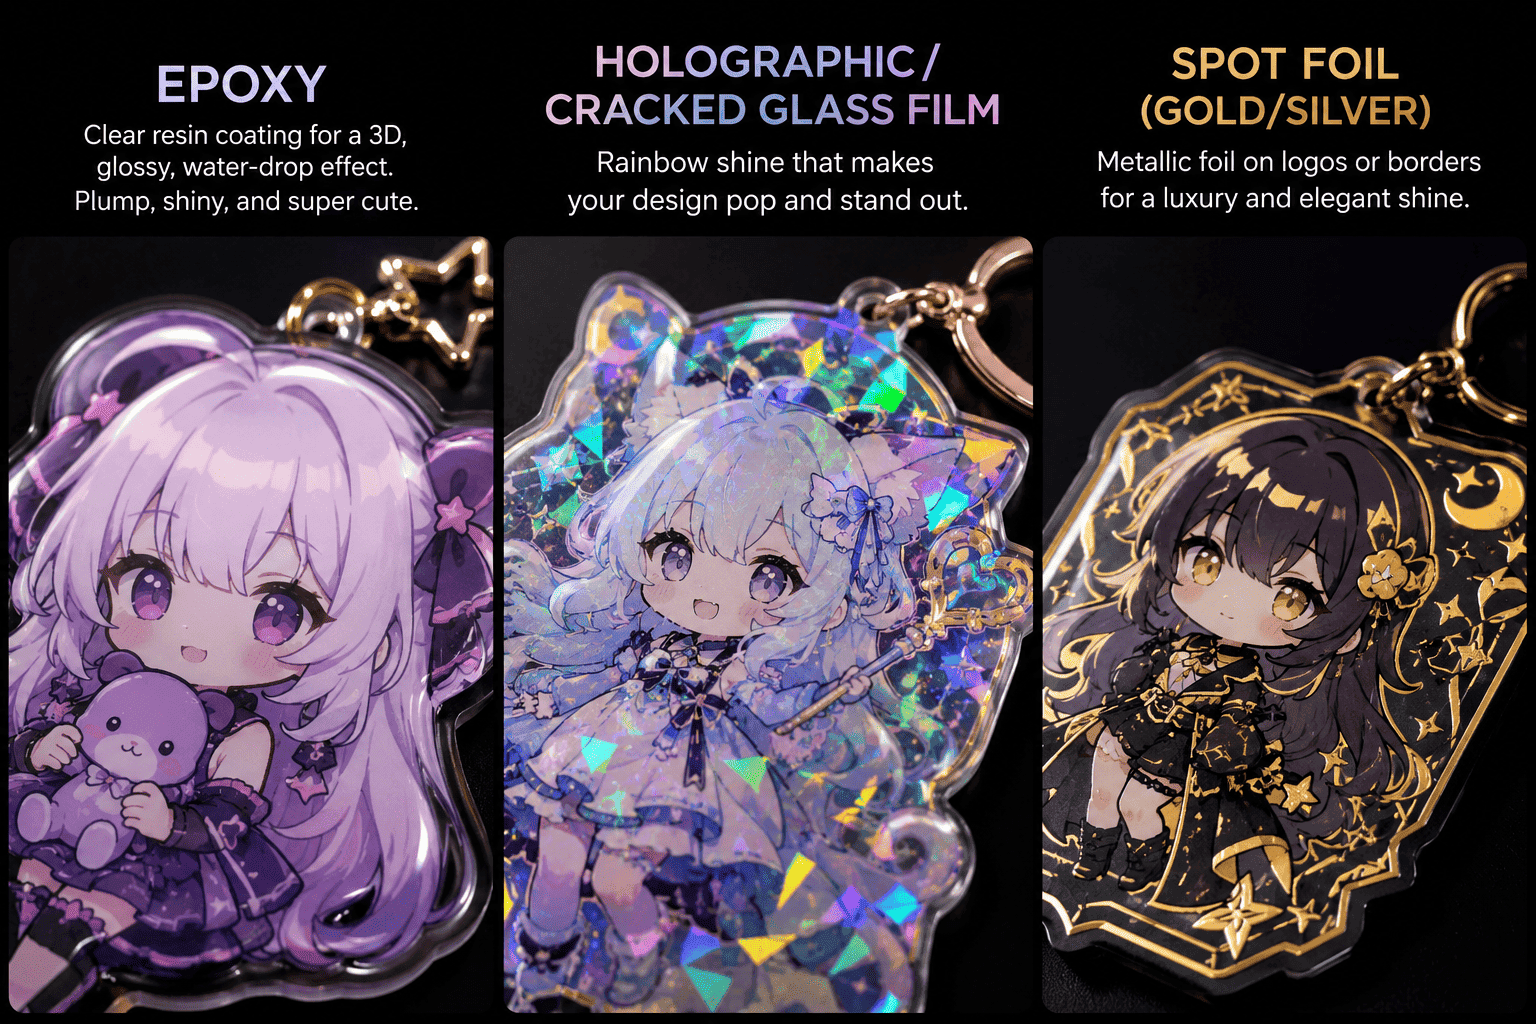
Epoxy coating: We drop a layer of clear resin onto the surface. Once it dries, it looks plump and round like a water drop. It looks super cute, though it might yellow slightly if left in the sun for years.
-
Holographic / Cracked glass film: We combine specific materials so your charm reflects a gorgeous rainbow shine. This is perfect for vibrant illustrations and instantly makes flat designs pop!
-
Spot Foil (Gold/Silver): We can apply foil stamping on your logos or borders. This adds a sweet metallic shine to give your design a touch of luxury.
Post-Production & Quality Control
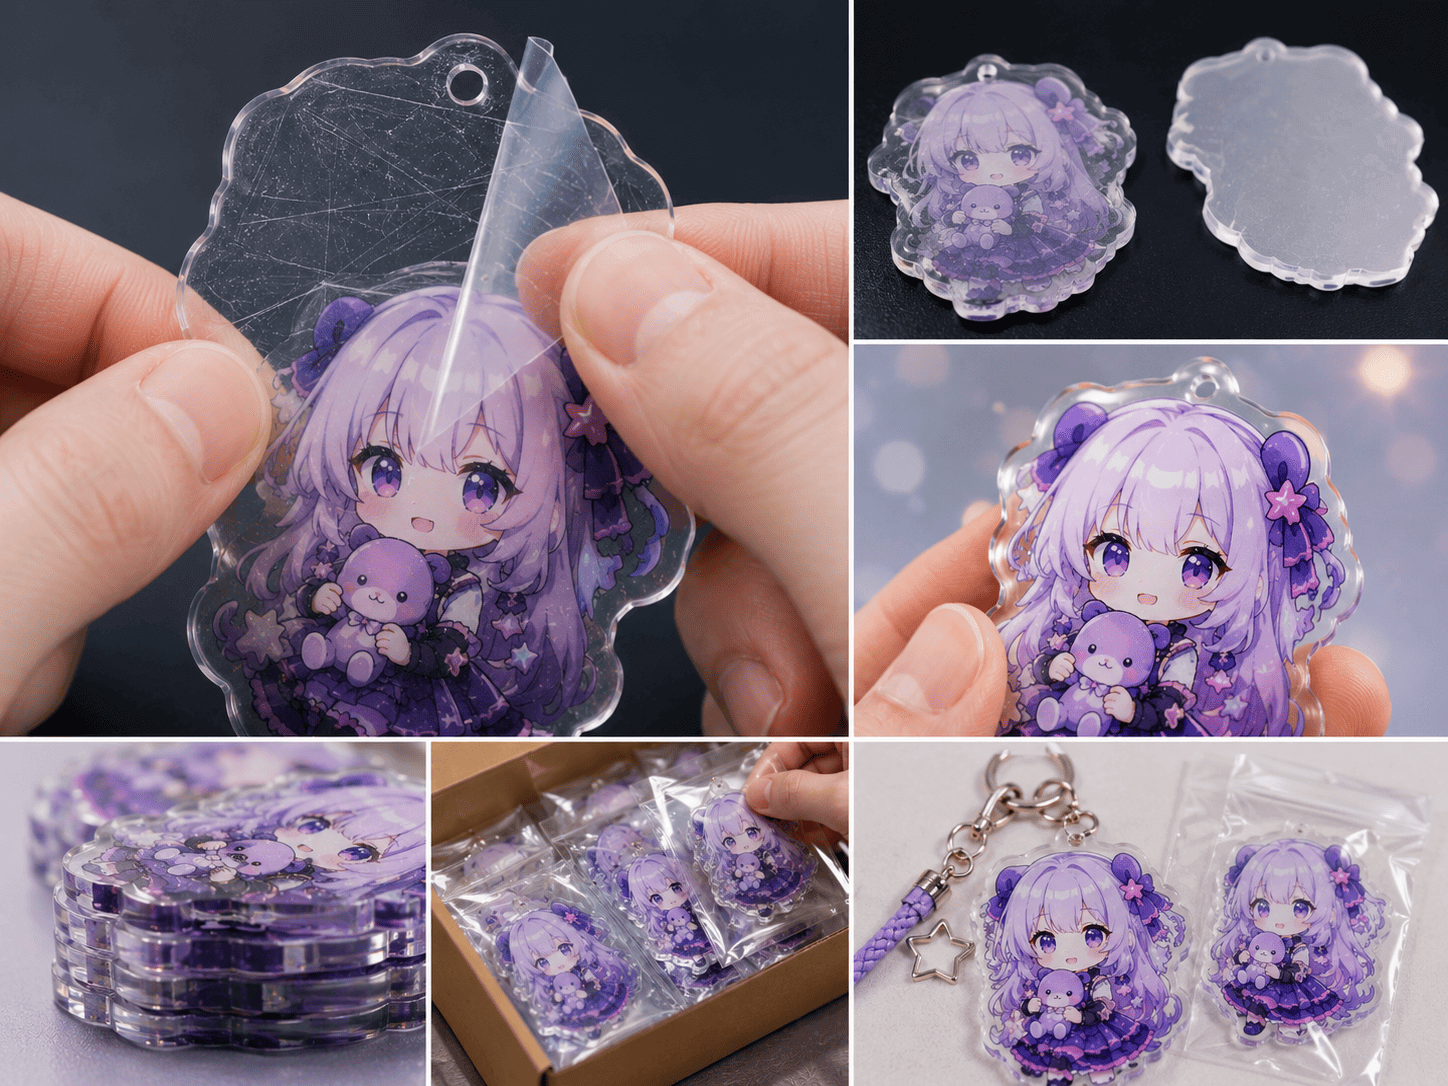
The Secret Behind “Scratches”: Protective Films
When you receive your shipment, don’t panic if they look scratched! When we ship out proper acrylic items, we stick a very tight clear or semi-clear protective film on both sides. Most of the time, what looks like surface scratches, bubbles, or rough edges are actually just marks on the film.
Just peel off that film, and you will see a flawless, crystal-clear surface underneath! If you are sending these out to your clients, we suggest you toss a small card into the packaging bag that says, “Please peel off the double-sided protective film before use.” This saves you from explaining things over and over again!