Whether you are seeking a high-quality acrylic standee printing service or are a professional custom acrylic standees maker, achieving crisp, vibrant results is paramount. Acrylic standees looking blurry or unclear isn’t always the printer’s fault. From shop-floor layout settings and machine calibration to the final unboxing experience, any misalignment in the process can lead to a “blurry” final image.
Here are the 5 most common reasons for blurry images in custom anime acrylic production, along with simple, practical solutions.
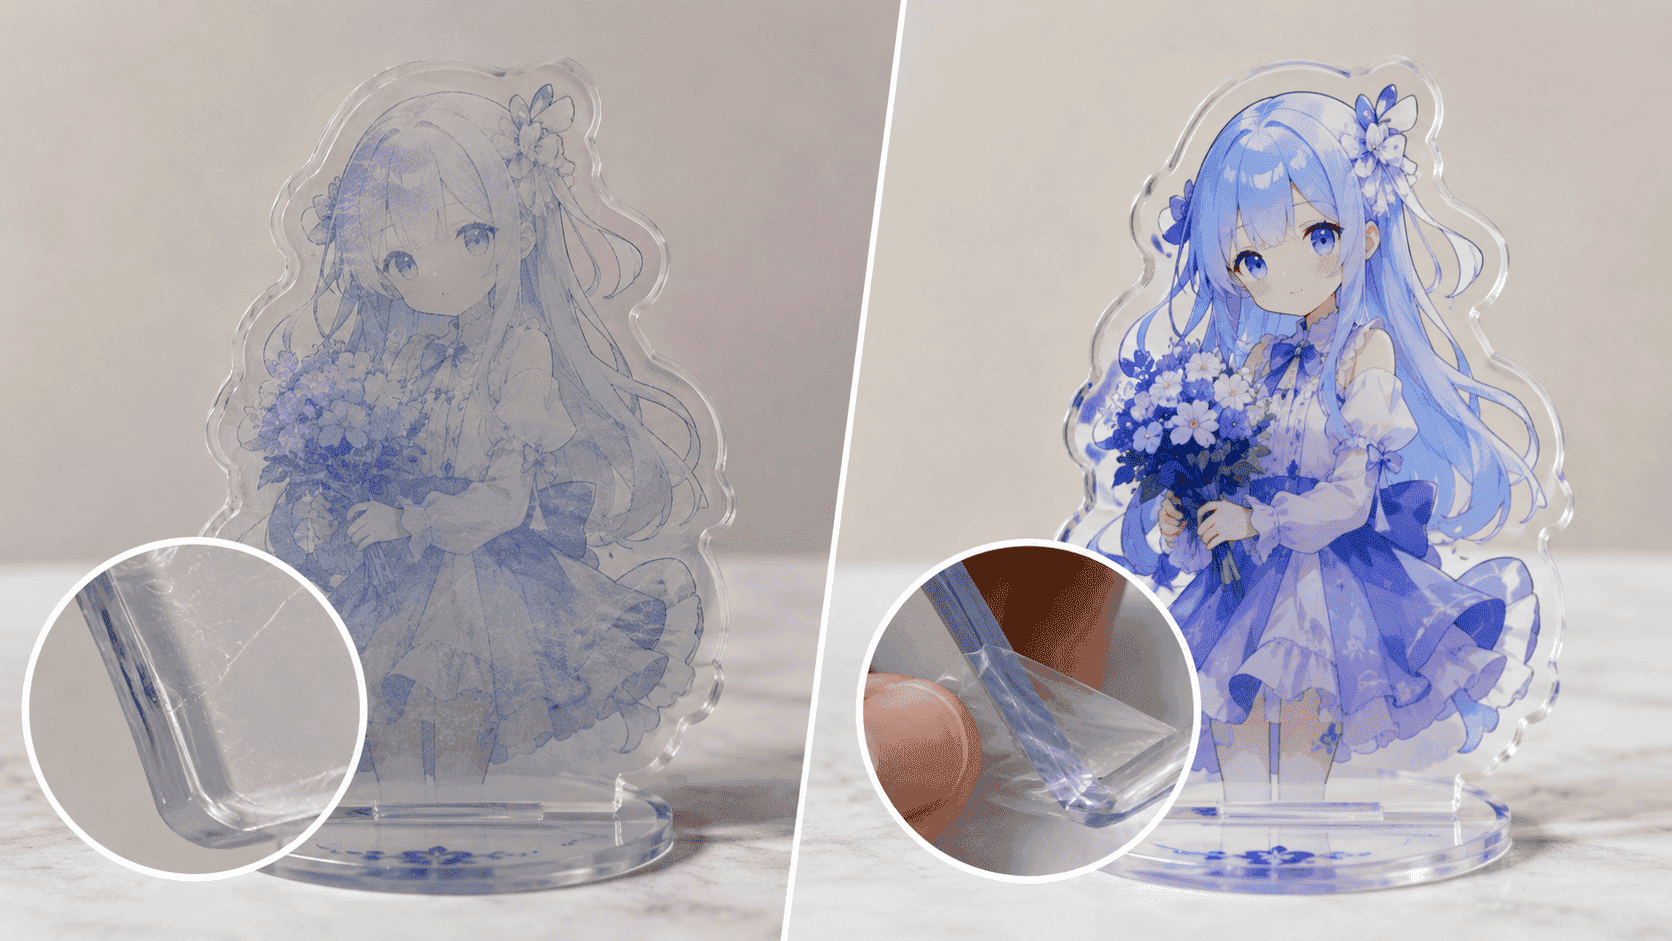
1. The “Fake Blur”: The Protective Film Wasn’t Removed
This is the most common customer complaint. To prevent scratches during production, both sides of the acrylic are covered with a protective film. Because most manufacturers use laser cutting, the heat often fuses the film slightly to the edges, making it nearly invisible. Scratches or fogging on this film during shipping can make the image underneath look grey and dull.
-
Solution: Advise the customer to stick a piece of clear adhesive tape onto the edge of the standee and pull firmly to peel the film off.
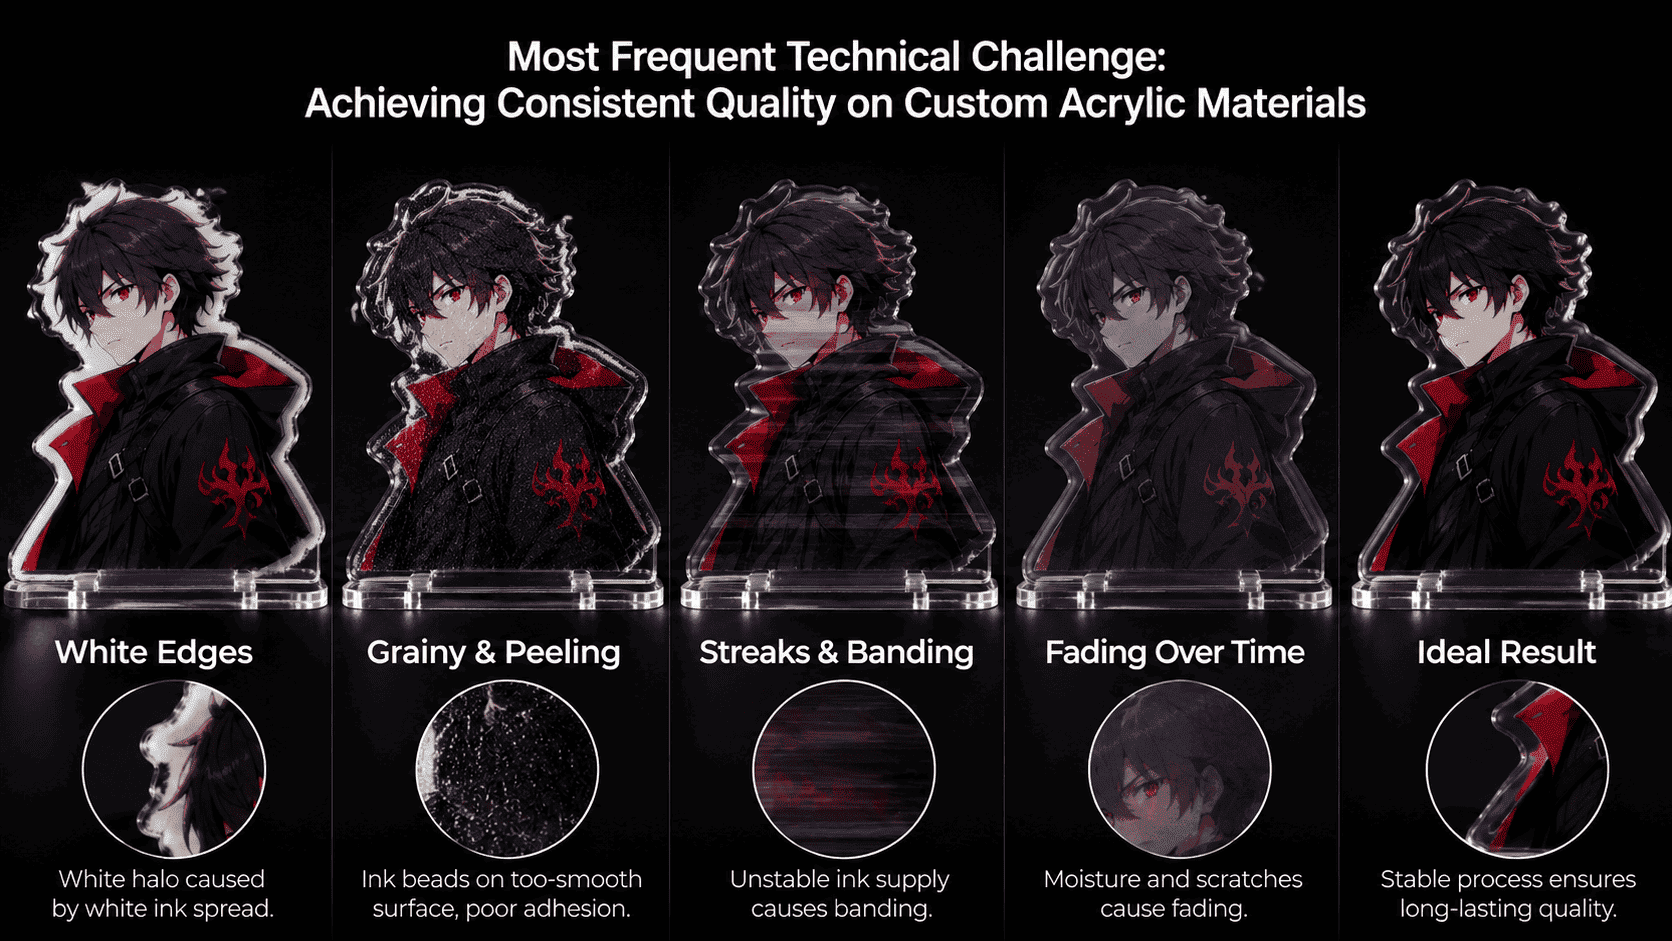
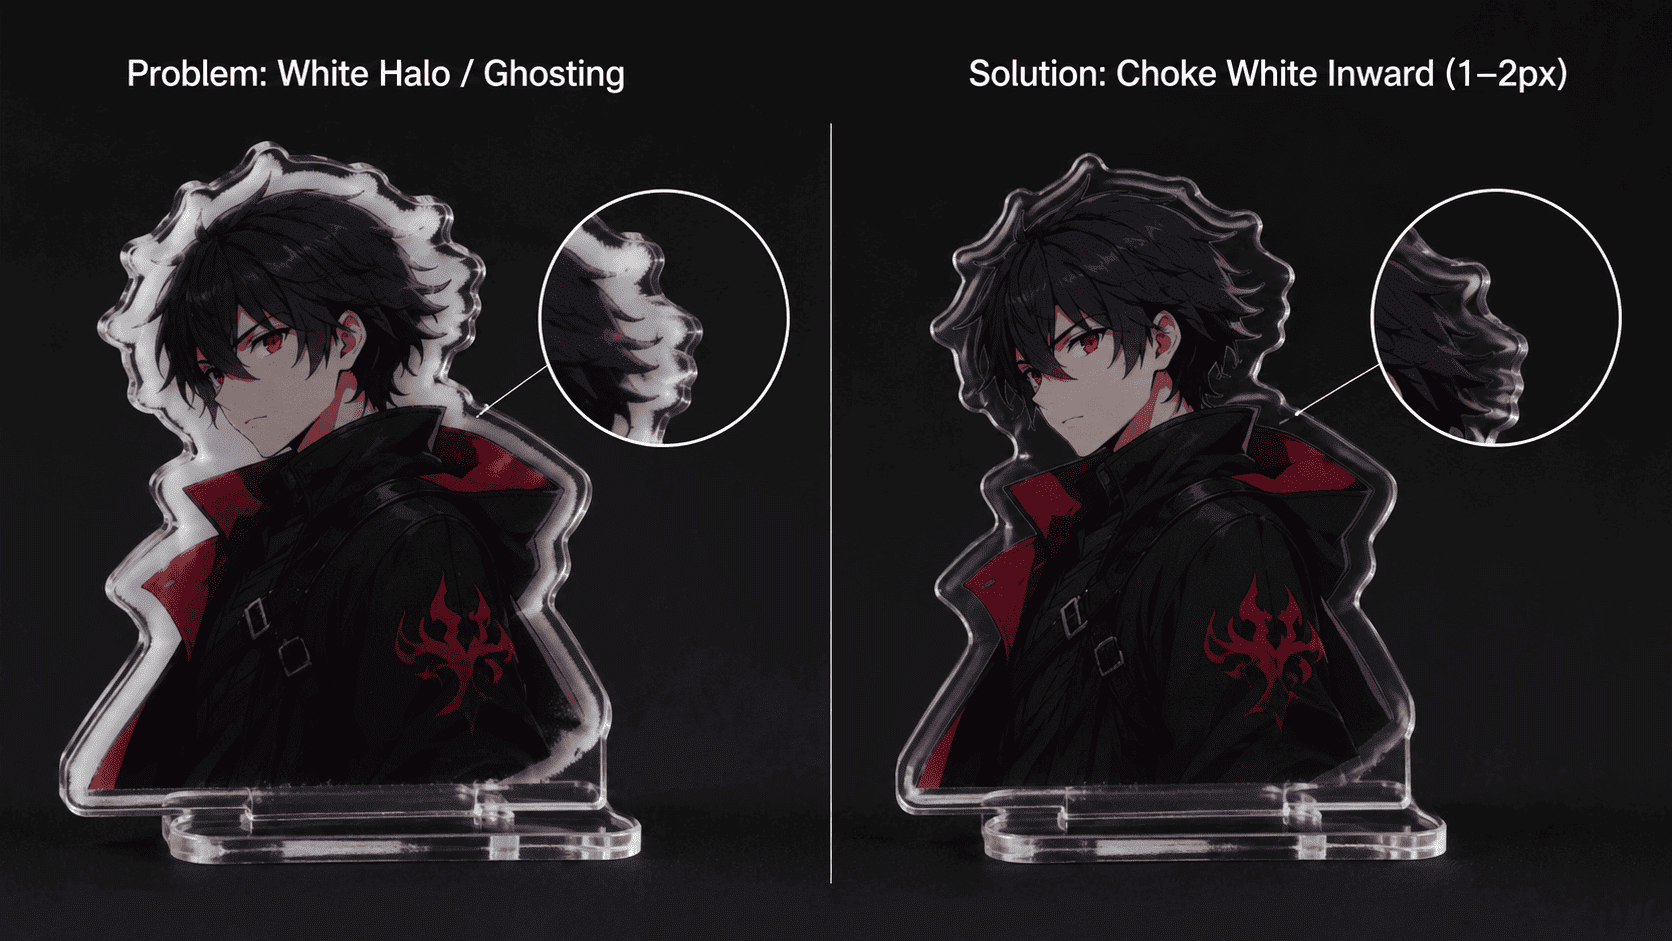
2. Ghosting or White Edges: Design & Software Settings
Sometimes the edges of custom anime acrylic pieces have an ugly “white halo.” This happens because white ink and color ink have different physical properties; white ink tends to spread slightly more after printing. Additionally, if the source file is low resolution or exported with “anti-aliasing” enabled, the print will look fuzzy.
-
Solution:
-
Ensure the source file is high-resolution with clean, hard edges.
-
In your RIP software, set the white base channel to “Choke” inward by 1 to 2 pixels to keep the edges sharp.
-
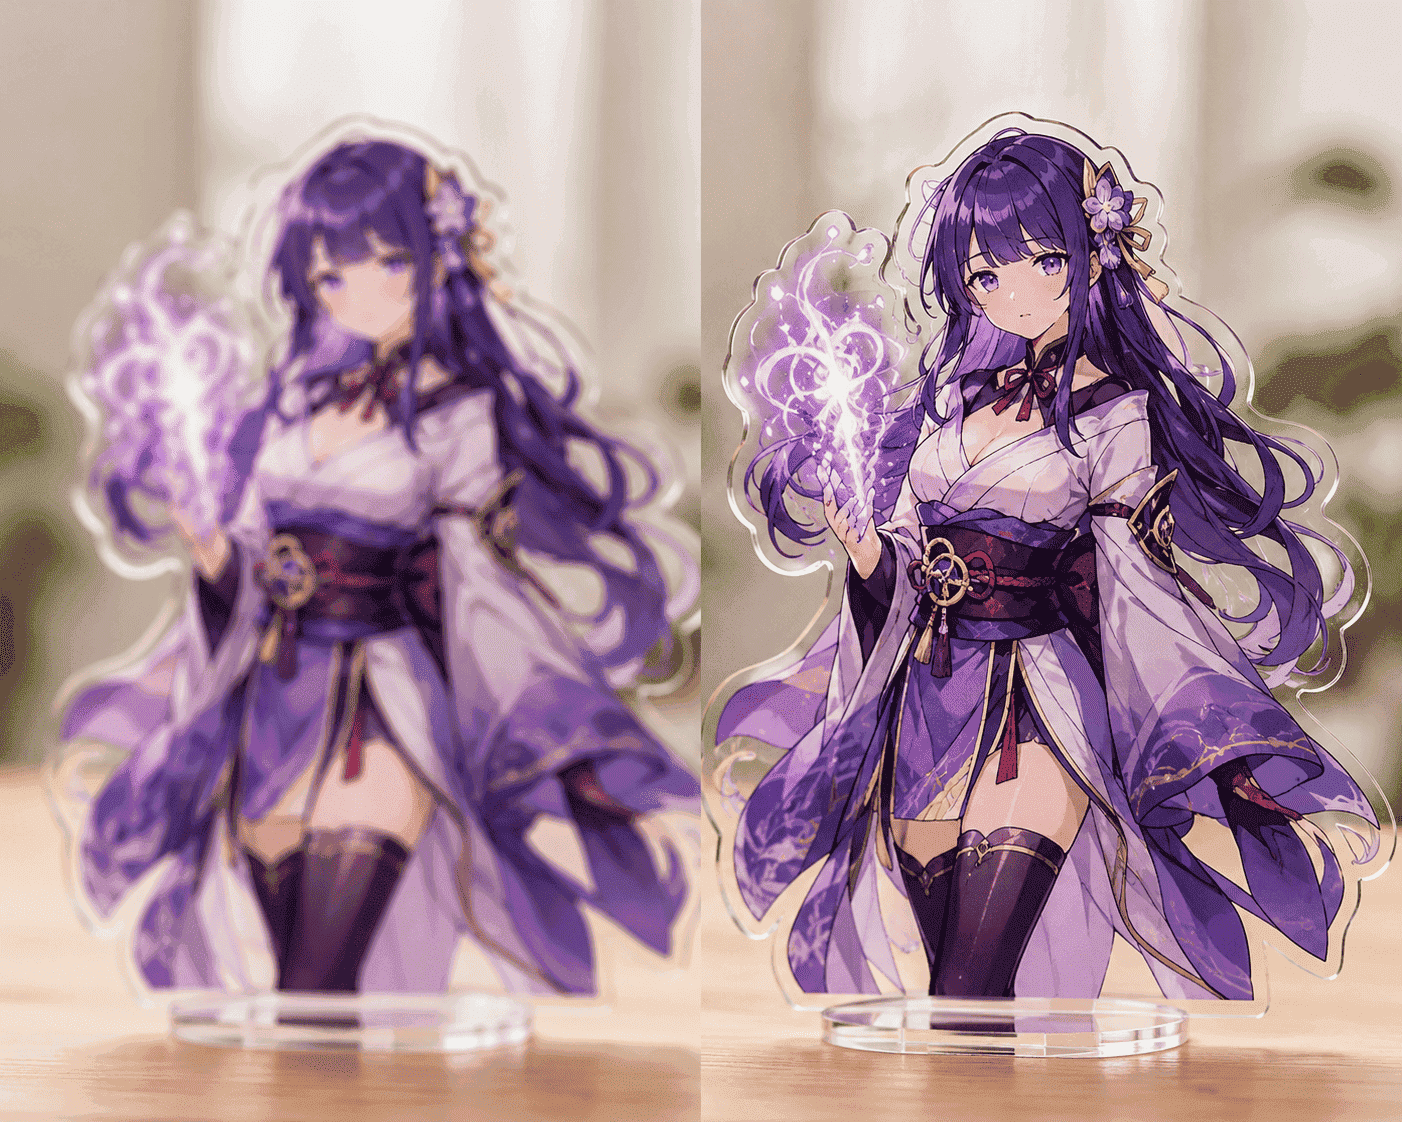
3. Grainy Texture & Peeling: The Surface is Too Smooth
Acrylic surfaces are extremely dense and smooth. If UV ink is sprayed directly onto the bare surface, it beads up into tiny clusters. This causes the image to blur into clumps and results in poor adhesion.
-
Solution: Before printing, apply a layer of adhesion promoter (Primer) on the acrylic surface. This acts like double-sided tape, gripping the acrylic while pinning the ink droplets in place for high-definition clarity.

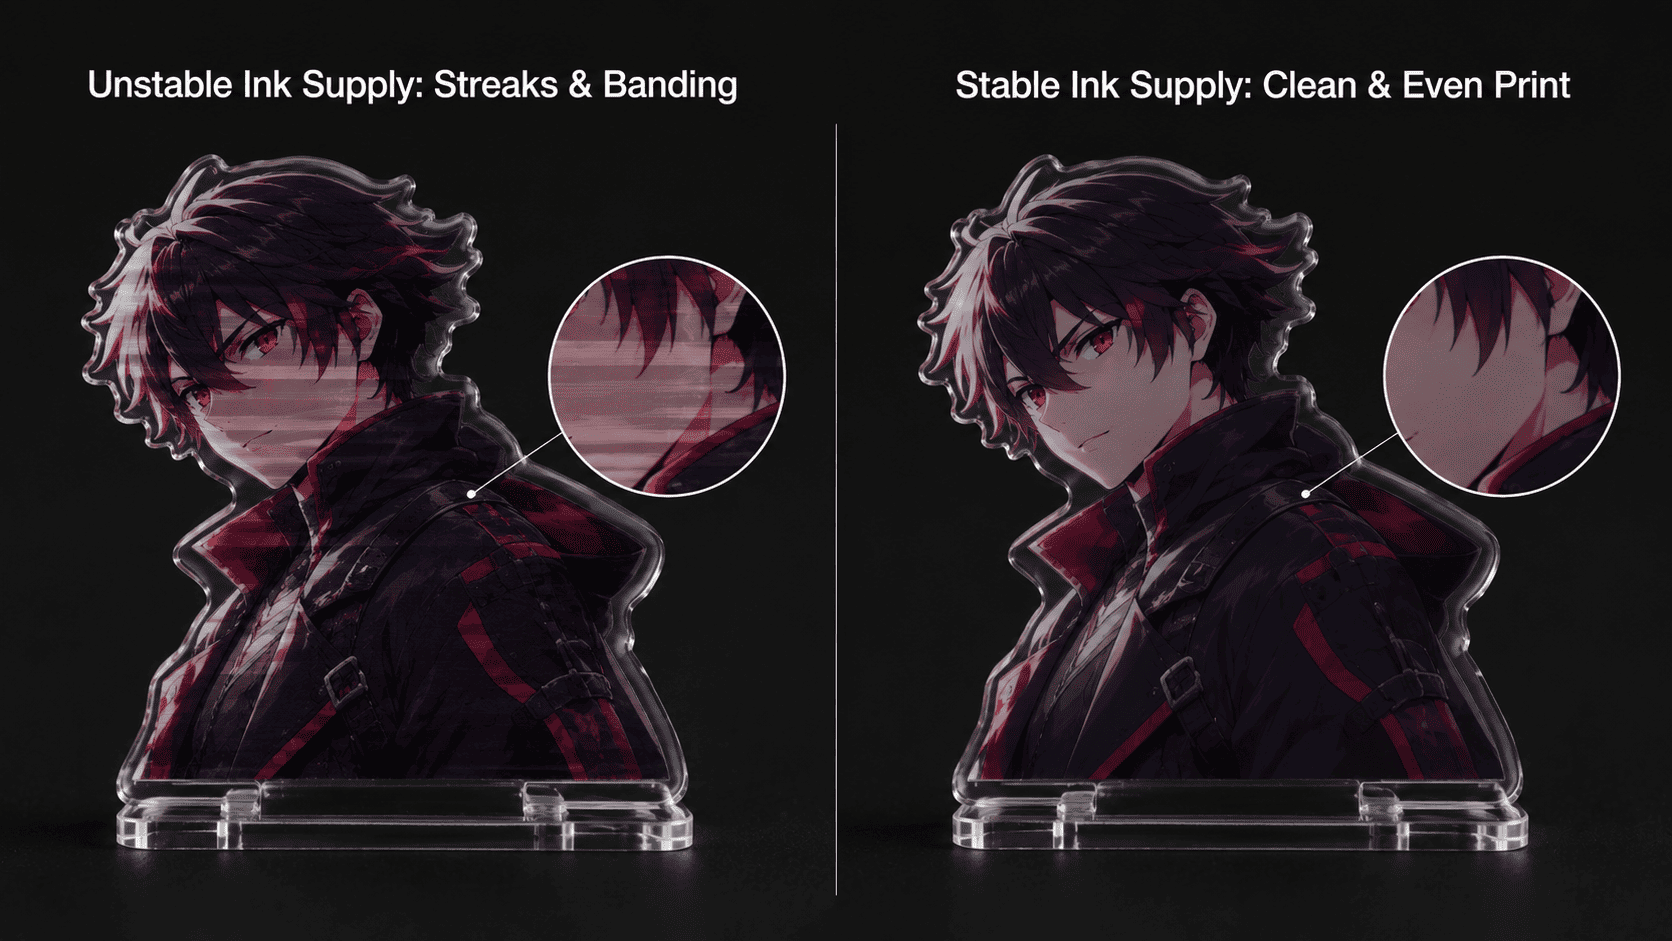
4. Streaks & Banding: Unstable Ink Supply
If your prints show uneven color or horizontal lines (banding), the printer head is likely suffering from “ink starvation.” The most common culprit is air entering the ink supply lines.
-
Solution: Pour ink slowly to prevent air bubbles. If the machine has an auto-calibration feature but the alignment remains off, check if the protective film on the internal sensor camera was removed—a common oversight for any professional custom acrylic standees maker.
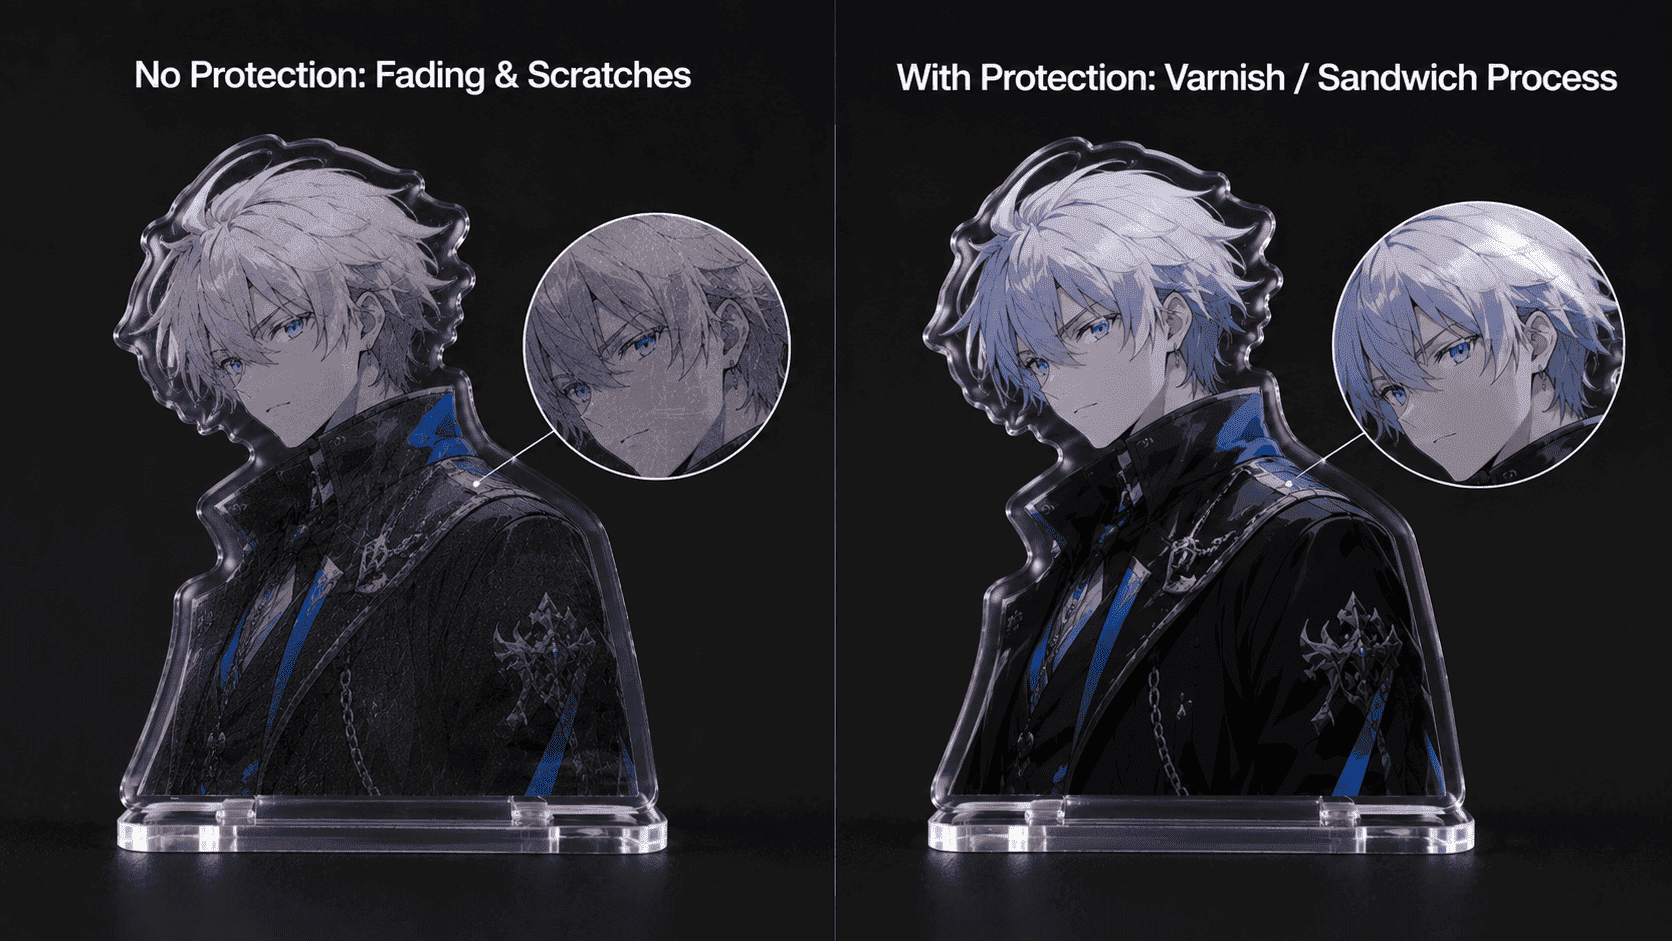
5. Fading Over Time: Lack of Post-Print Protection
During daily use, standees are exposed to moisture and friction. Moisture seeping into the ink layer or the accumulation of micro-scratches will cause the image to look white or dull over time.
-
Solution: Spray a layer of transparent UV Varnish over the printed surface to seal it, or use a “sandwich” (double-layer) process. This ensures that any high-quality acrylic standee printing service delivers a product that is both durable and visually stunning.
As a professional in the industry, what is the most frequent technical challenge you face when working with custom acrylic materials?